Google API Connection
Google API
You can make your website connect to the Google system with these systems:
● Google Login
● Google Map
Set up Google Login
The system enables customers or website visitors to apply for membership and login to the website easily by clicking through your Google account.
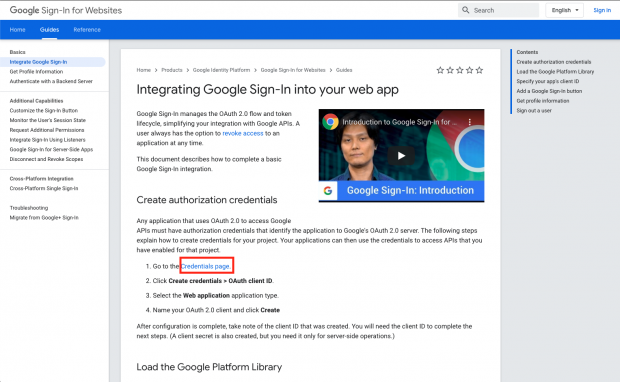
1. Go to https://developers.google.com/identity/sign-in/web/sign-in
2. Click on the Credentials page link.
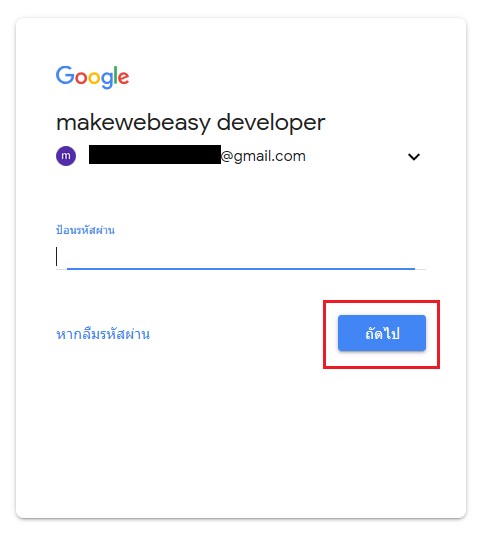
3. If you haven’t logged in yet, log in with your Gmail account, then click “Next” (If you have already logged in the system will take you to point 4.)
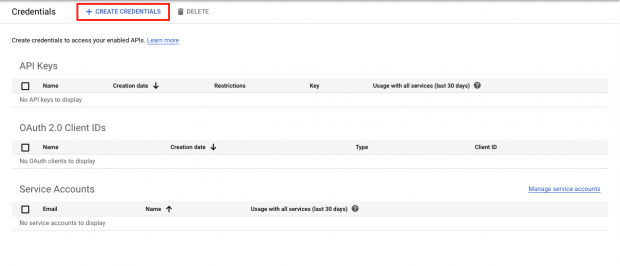
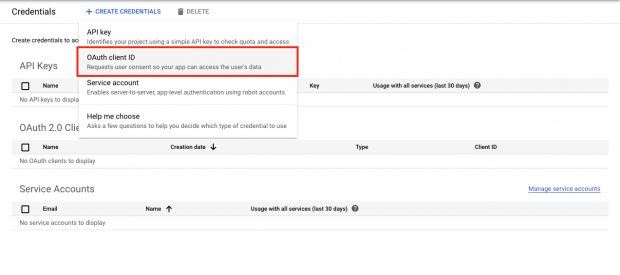
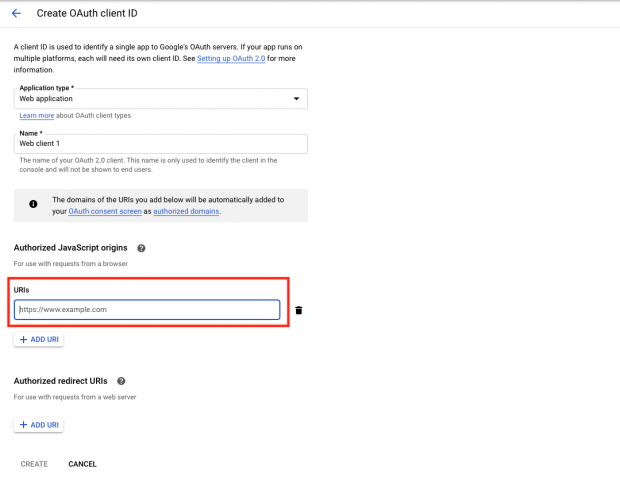
4. Click on the “+CREATE CREDENTIALS” button.
5. Click on the “OAuth client ID” option.
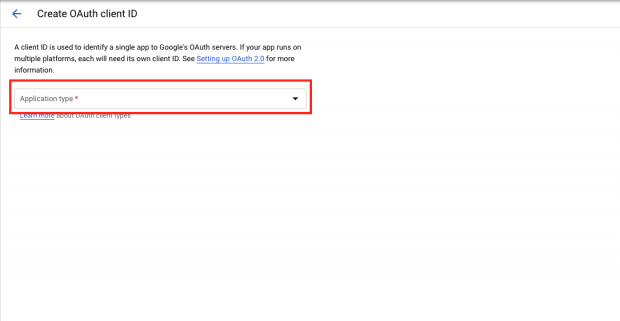
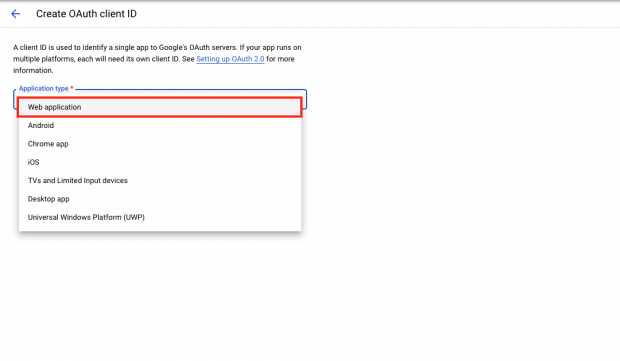
6. Click on the select box option and select Web application.
7. Click on the “ADD URI” button.
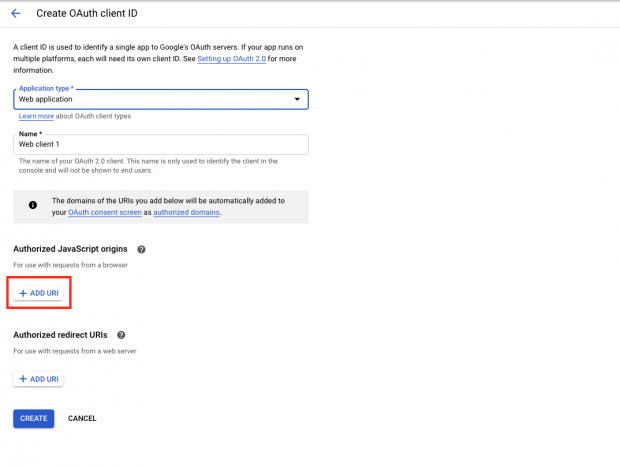
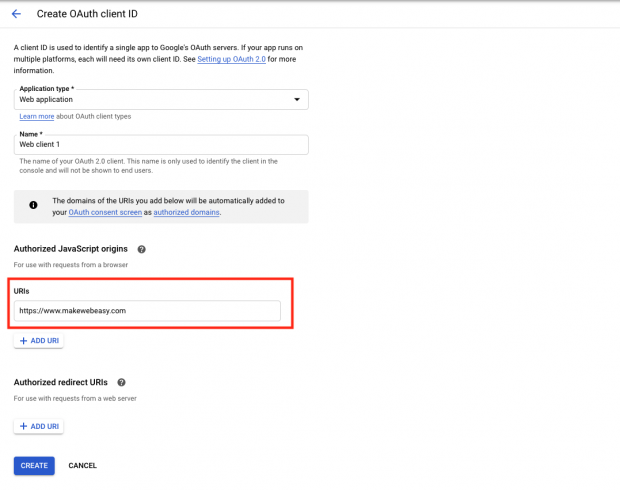
8. Enter your website URL starting with https (e.g. https://www.makewebeasy.com) and press the CREATE button.
9. In this section, you will get the Client ID for using Google Sign-In.
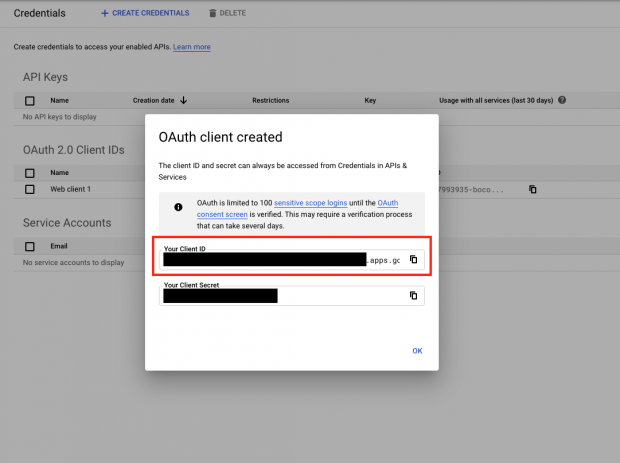
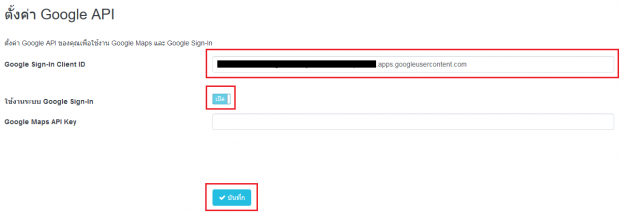
10. Enter the Client ID value into the Google Sign-In Client ID field on the Google API Settings page and then set to enable the Google Sign-In system.
Set up Google Maps
Map display system on the website for customers or website visitors Able to know the location of the store or company.
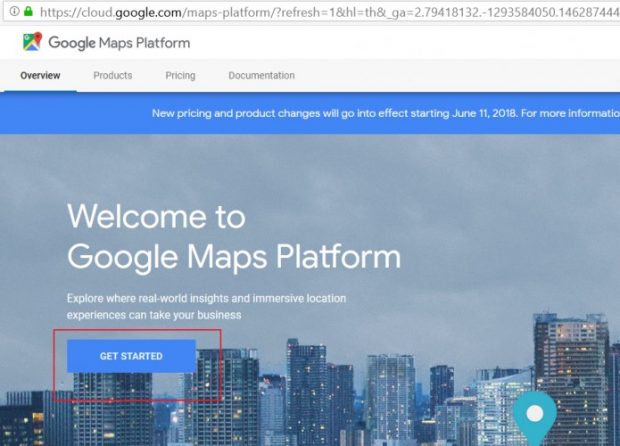
1. Go to https://cloud.google.com/maps-platform
2. Click on the GET STARTED button.
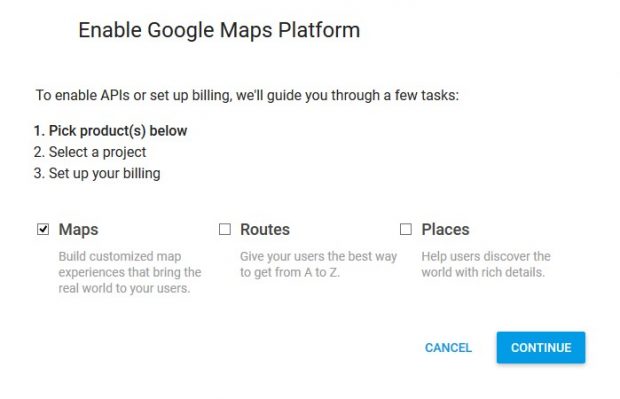
3. Click to select Maps usage and press CONTINUE.
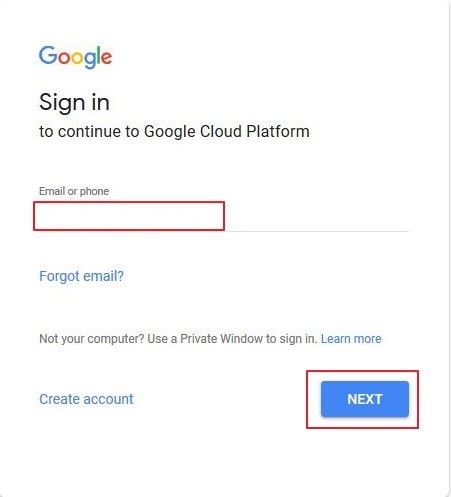
4. If you haven’t logged in yet, log in with your Gmail account, then click Next (If you have already logged in the system will take you to point 5).
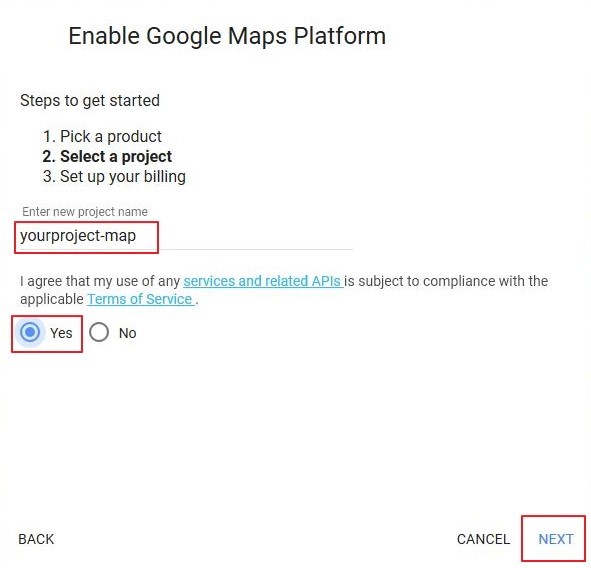
5. Fill the project name as desired. The name must contain more than 4 characters, including a space and – . When the name is complete, click to accept Yes and click NEXT.
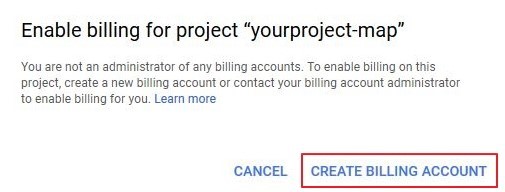
6. Click CREATE BILLING ACCOUNT to set up payment information.
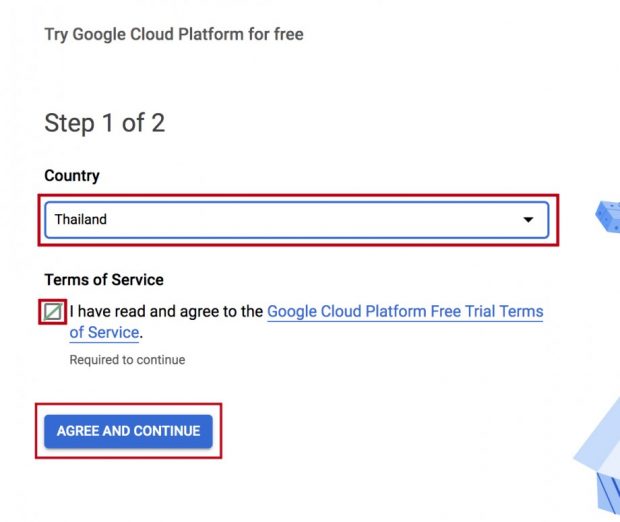
7. If your Google account has never been used to obtain a Google Map API key before, a 30-day free trial will be offered as shown in the image below. Select your country, such as Thailand, and review the Terms of Service > Click AGREE AND CONTINUE.
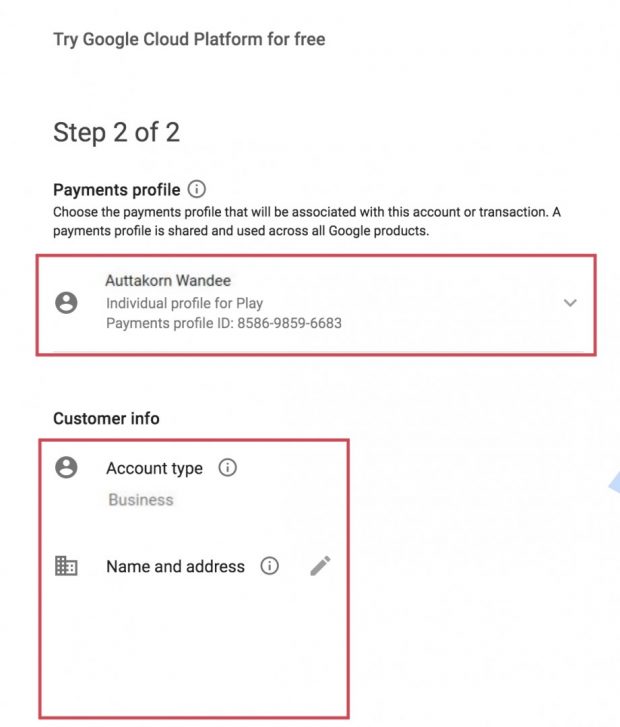
8. Set up a payment profile, edit your account type, and fill in your name and address (Step 2 of 2)
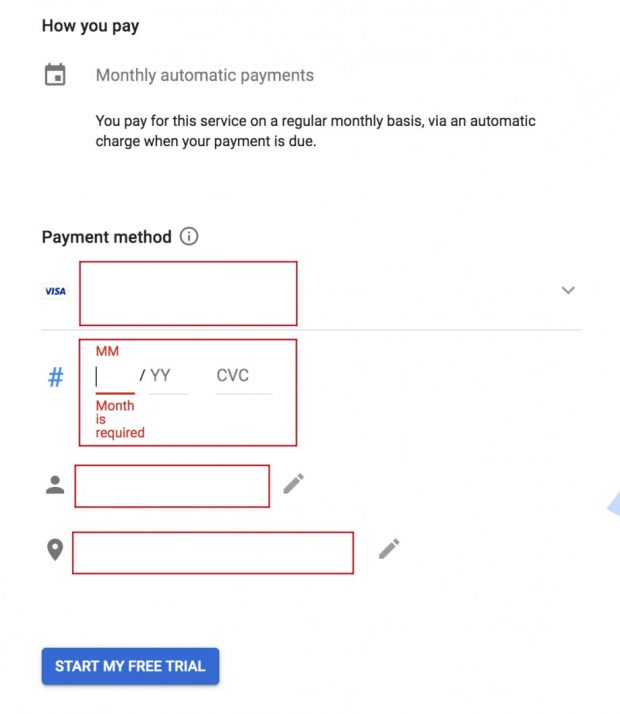
9. Scroll down to set your payment method. Edit your current name and location > Click START MY FREE TRIAL.
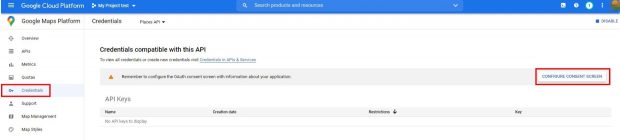
10. Once the credit card information has been set up. Click on the word Credentials and click on the word Configure consent screen.
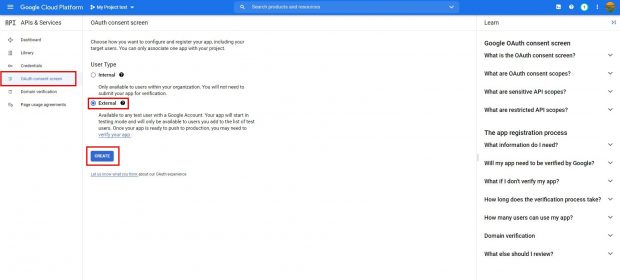
11. After that, on the next page you will see the OAuth consent screen. Select User Type as External and press Create.
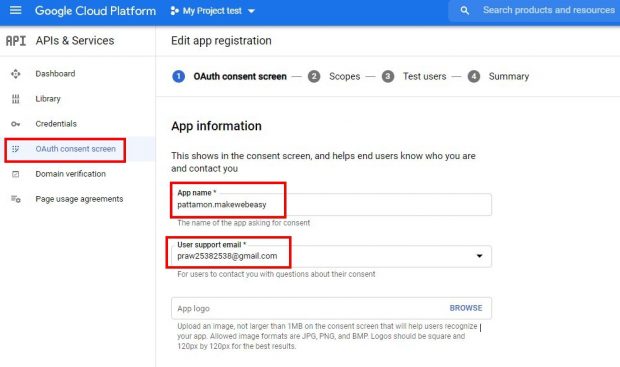
12. Fill in the information in the App information field. App name should be a domain name that does not contain .com, for example makewebeasy. For User support email, enter it as the email name that we used to register initially.
And in the Developer Contact information field, enter the email name used to register as well, as in the picture.
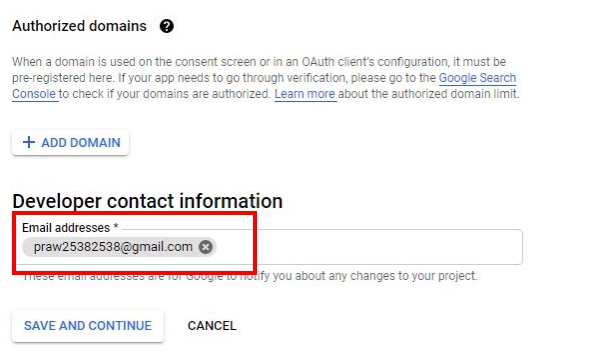
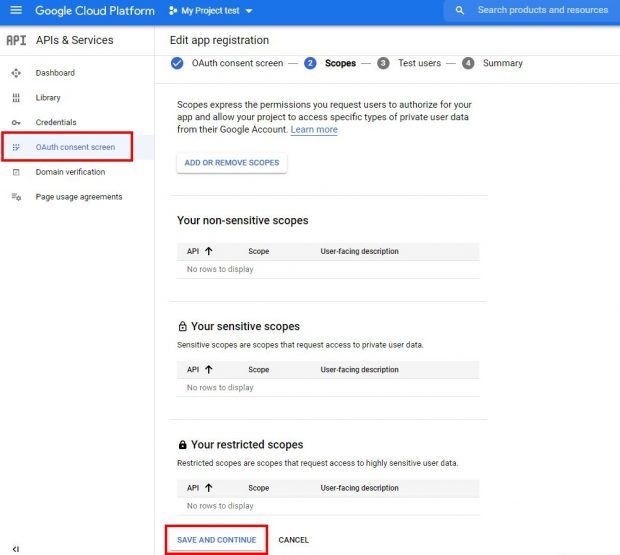
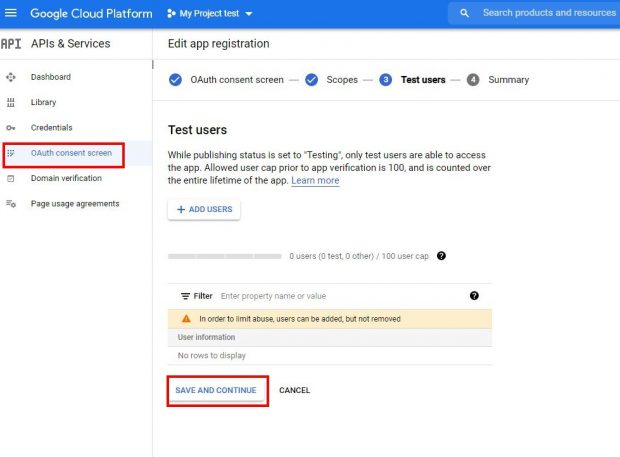
After that, click on the word SAVE AND CONTINUE.
And click on the word SAVE AND CONTINUE again as well.
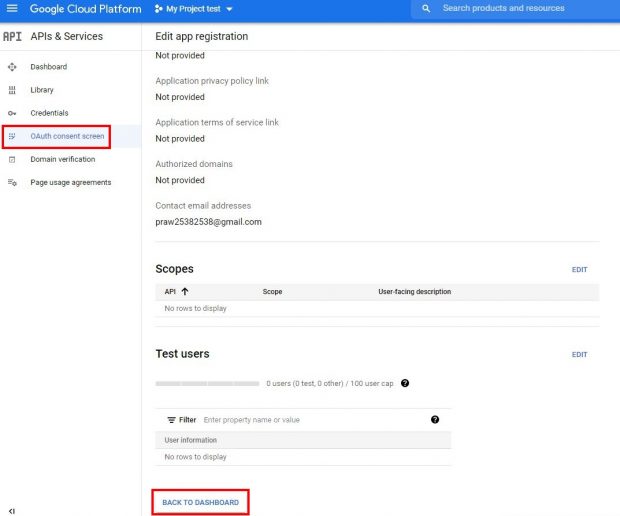
After that, click on the word BACK TO DASHBOARD.
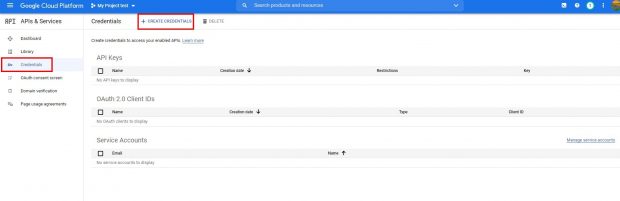
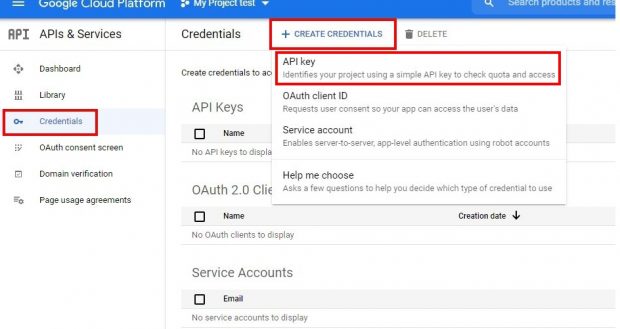
13. Click on Credentials and click on +Create Credentials and click on API key.
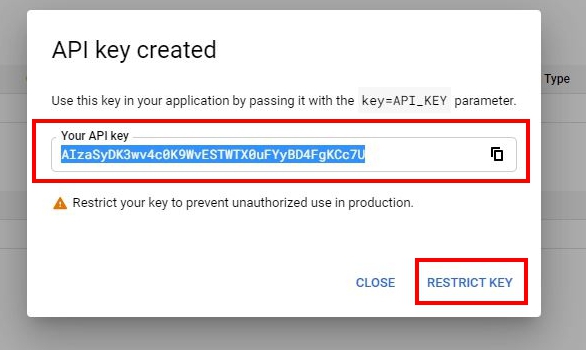
14. After that, press copy Your API key and click on the word RESTRICT KEY.
15. In the Application restrictions section, click on HTTP referrers (websites) and in the Website restrictions section, click on ADD AN ITEM.
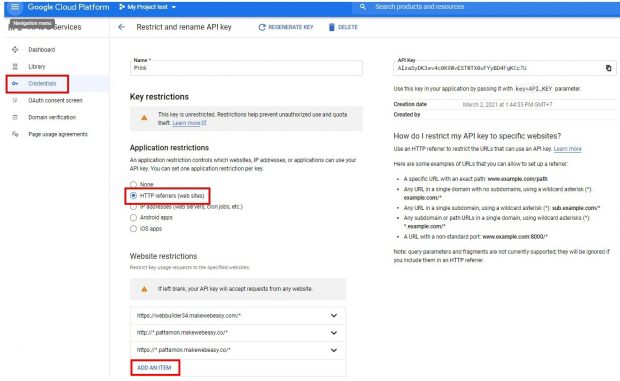
The information in the ADD AN ITEM section must be taken from the back-end system.
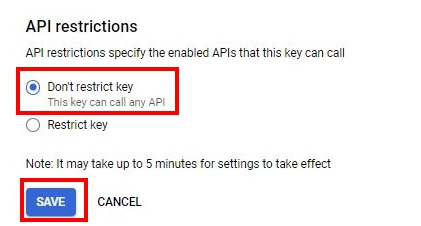
16. Under API restrictions, click on Don’t restrict key and click on save.
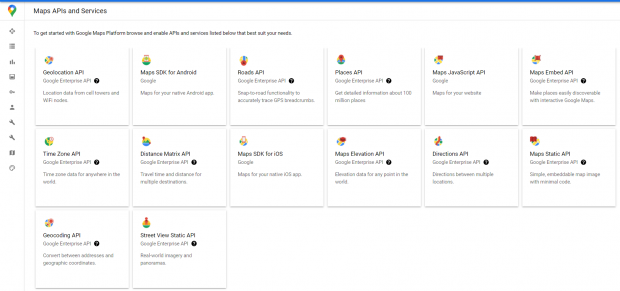
17. After that, click on the word APIs to activate the 4 topics as follows.
1. Geocoding API
2. Geolocation API
3. Maps JavaScript API
4. Places API
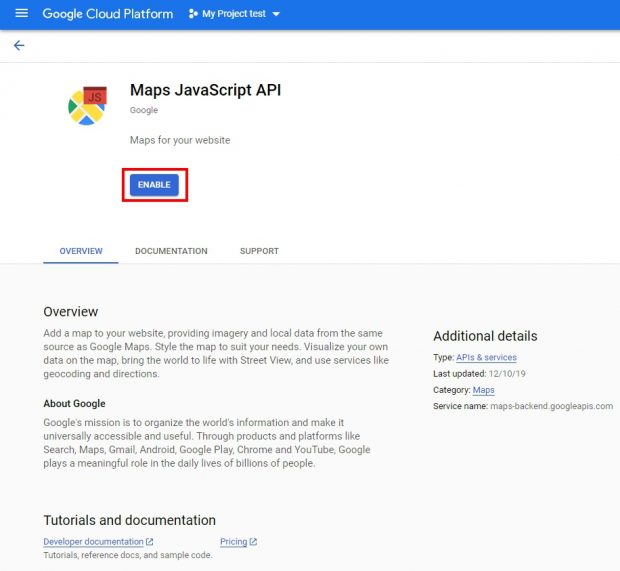
For example, to enable the Maps JavaScript API, click on it. You will see the display page as in the picture. Click on the word ENABLE and it is considered finished opening.
After that, press the back sign ← and click on the word APIs in the left bar to return and open all 4 topics as shown in the picture.

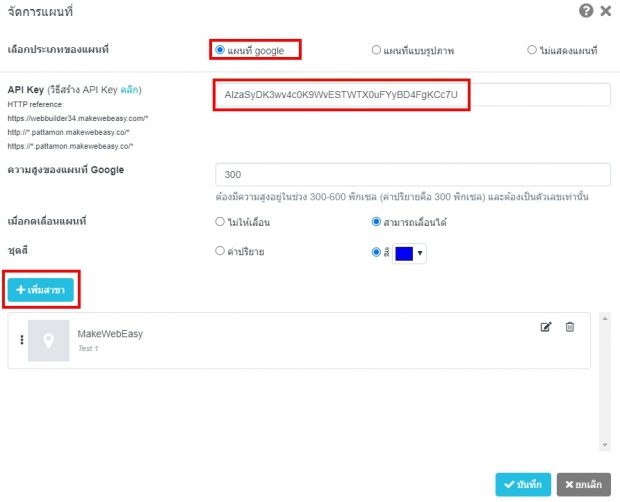
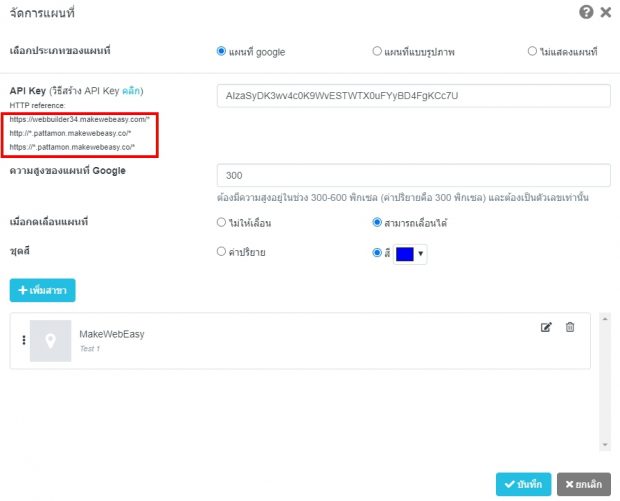
18. Return to our website. Go to the Design page > Contact Us menu > Click on the word Map and Branches > Manage > Let us paste the API Key that we copied in item 14 > and click Add Branch > Save.