Customizing Footer, Contact Box, and Social Media Widget
Footer is always attached on every website page just like header and show at the bottom of your website. This section will provide information that displays the logo, menu, contact box, or social media. There are 4 contents you need to manage in footer section:
- Footer Menu
- Widget
- Background
- Layout
1. Manage footer menu
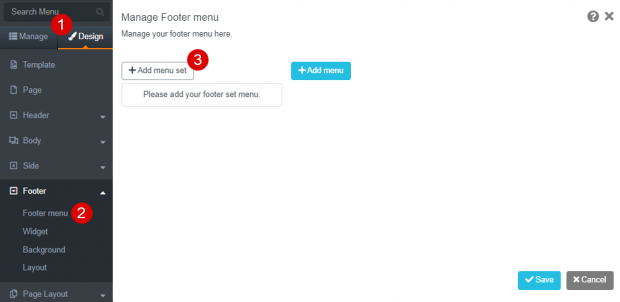
1. Navigate to Design
2. Select Footer > Footer Menu
3. Click + Add menu set button
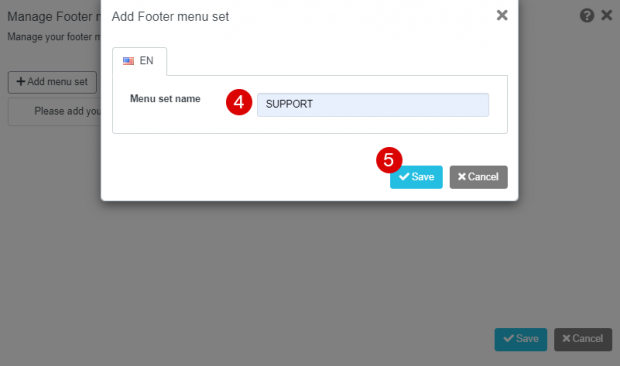
Note: the menu set is shown depends on the chosen layout style
4. Name the Menu Set
5. Click the Save button
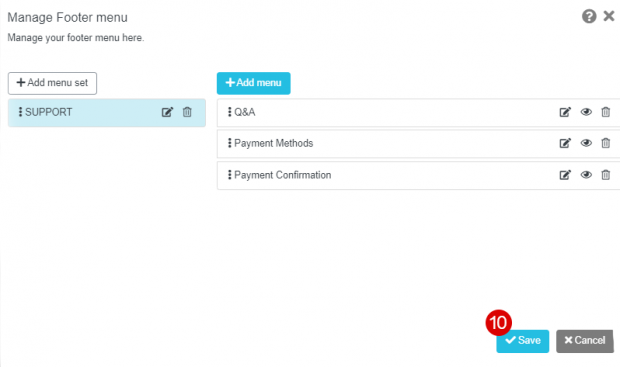
6. Click + Add menu button to add a new menu. Make sure you create a new menu inside the correct set menu (the active set menu is the blue bar)

7. Name the Menu
8. Select the link type to redirect the visitor to other pages
9. Click the Save button

10. Add all the menus in the set, click the Save button
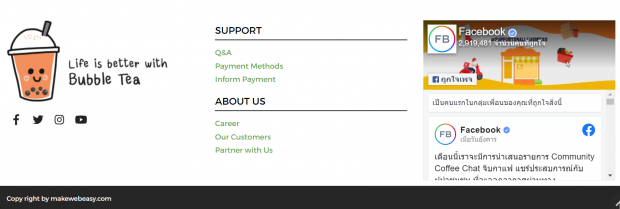
The result after adding the footer menus
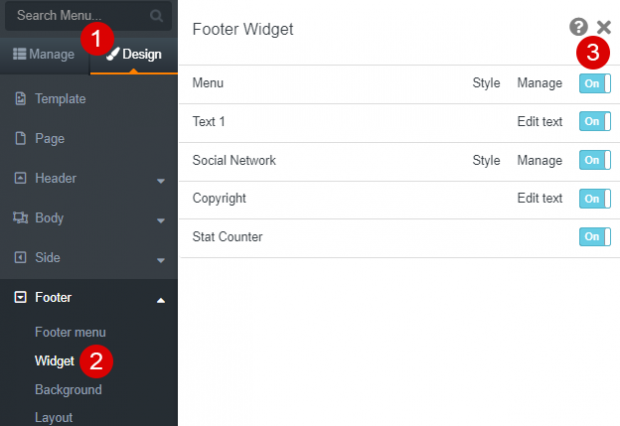
2. Set up the widget
1. Navigate to Design
2. Select Footer > Widget
3. Swipe On/Off for your required widgets
Note: different layouts will show different widgets

The result when attaching the footer menu and widget that appear on the bottom side of your website
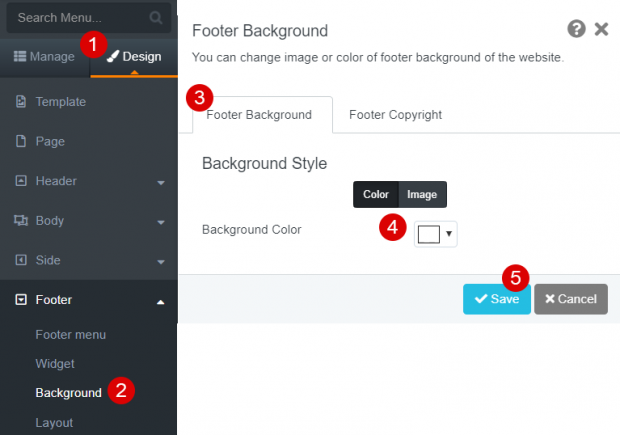
3. Customize background
1. Navigate to Design
2. Select Footer > Background
3. Select the Footer Background tab
4. Choose a background color or make it transparent
5. Click the Save button
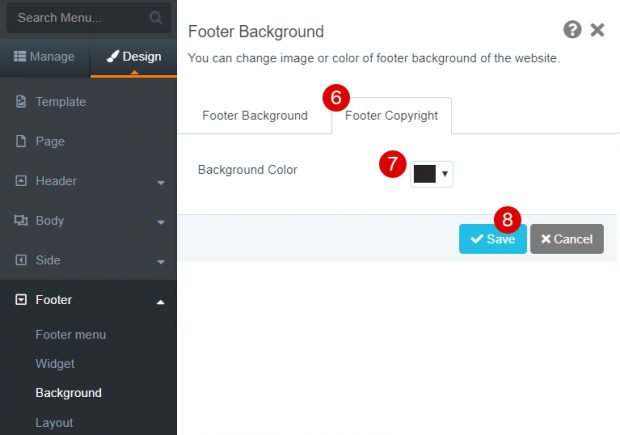
6. Move to Footer Copyright tab
7. Choose a background color or make it transparent
8. Click the Save button
Note: while customizing the footer background, do not put vivid color and too many pictures as it will make your footer menu difficult to read

The result when we set white color as footer background and black color for the footer copyright
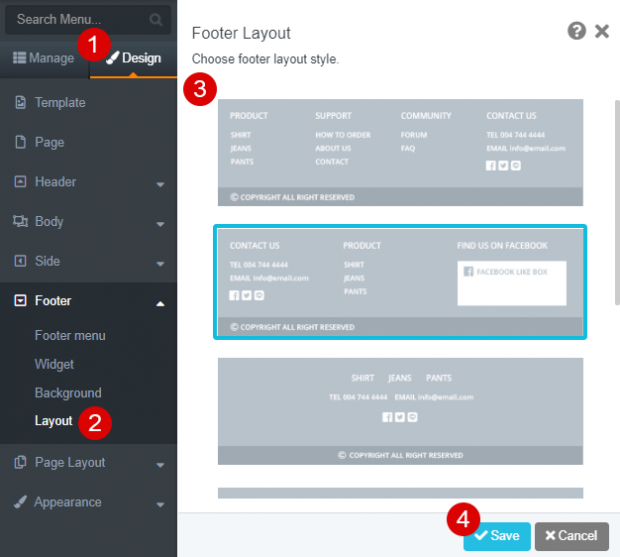
4. Set up layout
1. Navigate to Design
2. Select Footer > Layout
3. Choose the layout style. The selected layout will be framed blue
4. Click the Save button
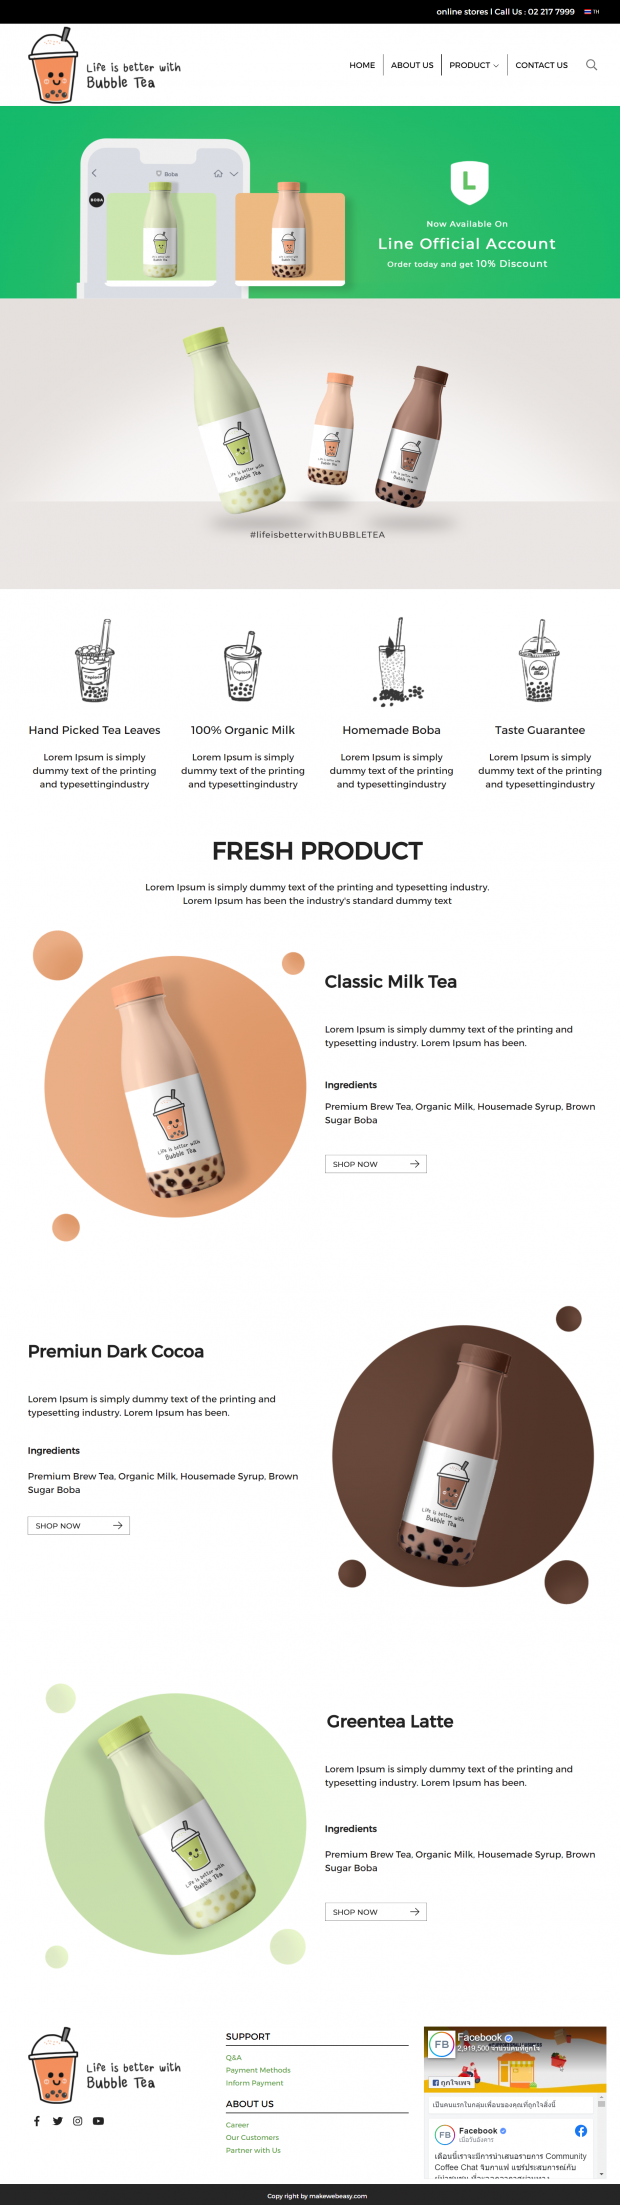
The result after managing all contents in the footer section
Yuka
Business Development at MakeWebEasy