Customizing Set Menu, Logo, and Widget
Header is the consistent area at the top of the website that usually includes navigation menu, logo, widgets, contact, as well as social media account. This article will elaborate on how to customize each component on the header.
- Header menu
- Logo
- Widget
- Background
- Layout
1. Managing header menu
1. Navigate to Design
2. Select Header > Header Menu
3. Click Add menu button
Note: the existing menu is included in the selected template. To use the template just click and edit it. If you want to reconstruct the menu, we suggest removing them all first and add new menus (home menus can not be removed)

4. Name the Header Menu
5. Select the link type, for example: Page
5.1 URL: if the link is an internal menu, use this type. Just click and the menu will pop up
5.2 Page: if the menu contains text, images, or custom designs, this link type must be applied for your menu. You need to create a new menu on the first page. After it’s been created, there will be several options
5.3 Anchor: used when the website is a single page. Select the menu and scroll down to the section (on the same page). We need to create a new page menu and the section first
5.4 No link: used when the new menu is the main menu with a sub-menu You do not need to link it anywhere
6. Click the Save button
Additional instructions: tick Open in new window when the menu leads to an external website. If it is still under the same website, you do not need to tick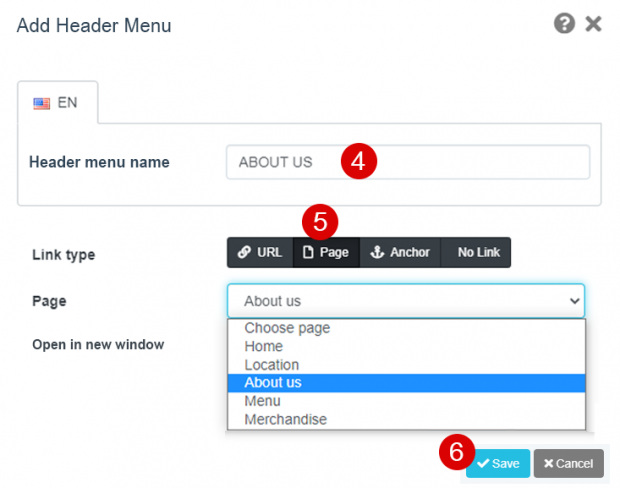
7. The new menu that we have created will be displayed on the header menu
Additional instructions: when creating a page and you want this page to be a menu as well, select Menu on Page link type, so your content page will appear withput creating a new menu later
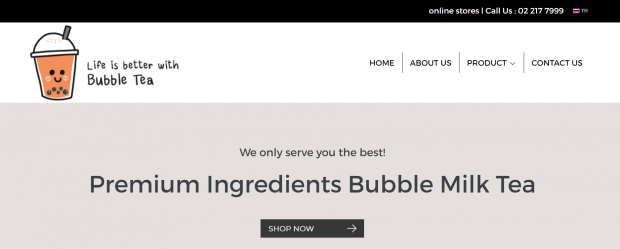
The new menu will appear at the top of website
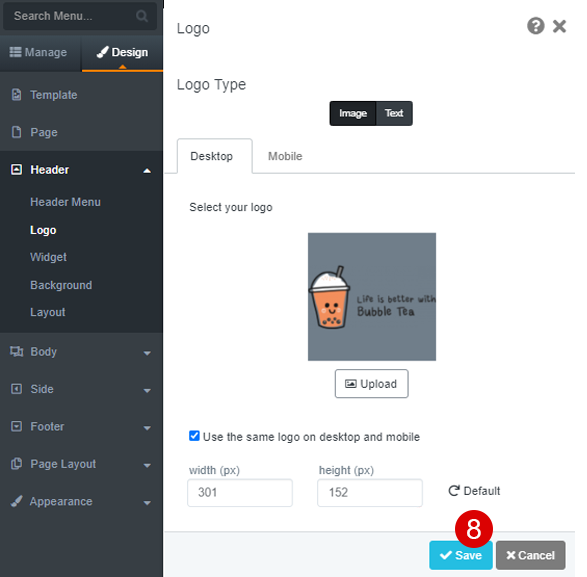
2. Set up your logo
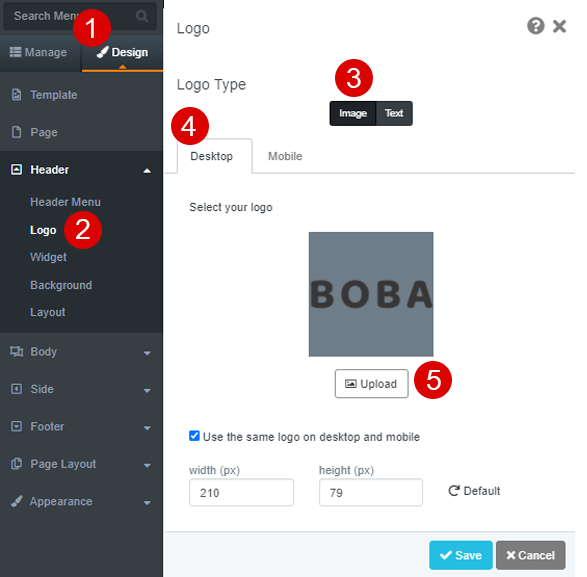
1. Navigate to Design
2. Select Header > Logo
3. Select Image for logo type or Text if you do not have any logo picture
4. Select Desktop
5. Upload your own logo
Additional instructions: you can type letters for your logo if you do not have any picture. Besides, if the logo does not work for Mobile display, untick the sharing option, select Mobile tab, and re-upload your logo
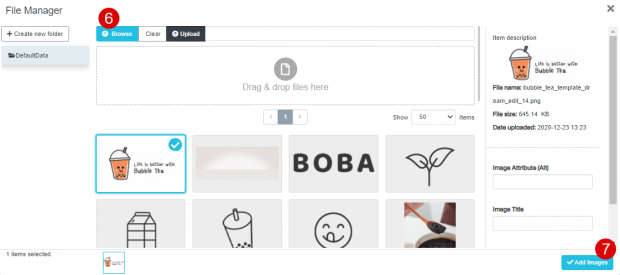
6. Click Upload button and the File Manager box will pop up. Click Browse to upload your file
7. Click Add Image button
8. The original logo has been replaced with your own logo. Click Save button to complete this step

The new logo has been applied
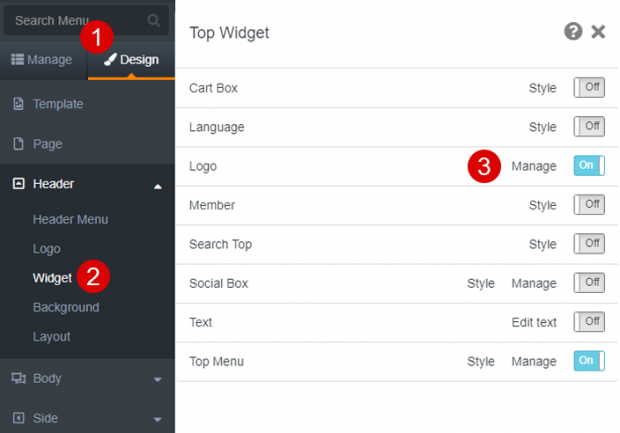
3. Set up the widget
1. Navigate to Design
2. Select Header > Widget
3. Swipe On/Off for your required widgets
Note: if you want to adjust widget design, click Style and customize your widgets

The active widgets will be shown on the page
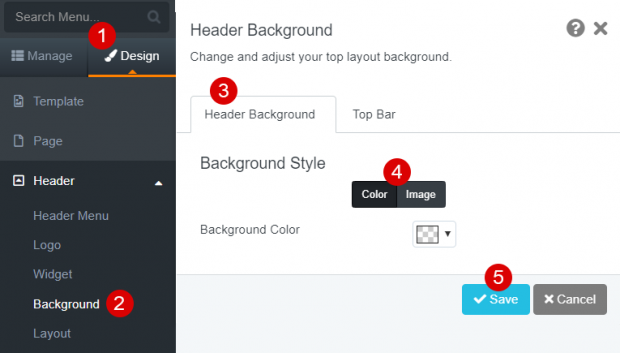
4. Customize background
1. Navigate to Design
2. Select Header > Background
3. Select Header Background tab
4. Choose a background color or make it transparent
5. Click Save button
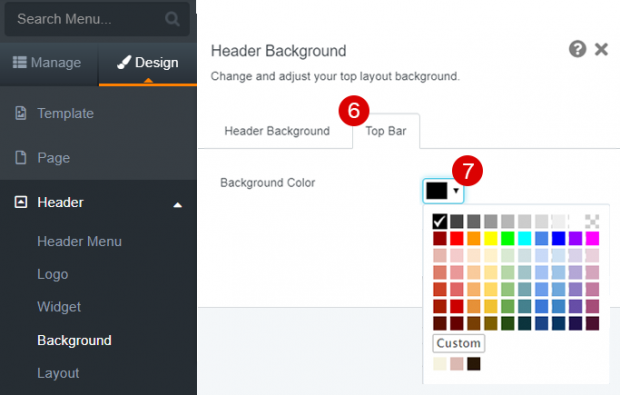
6. Switch to Top Bar tab
7. Choose a color and click Save button
Note: while customizing the header background, do not put vivid color and too many pictures as it will make your header menu difficult to read

The result if we choose transparent header background and black color for top bar
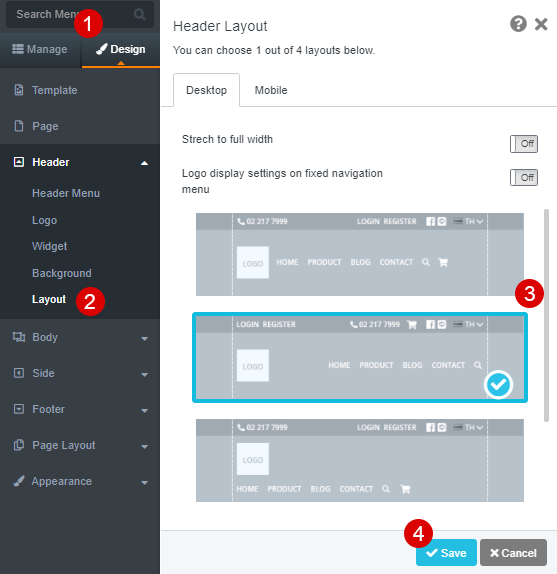
5. Format setting
1. Navigate to Design
2. Select Header > Layout
3. Select Desktop tab > choose your header layout
4. Click Save button
Additional tips: When a menu is in a mobile format, it will show as a three-line icon or so-called hamburger menu. You can choose the layout from the Mobile tab

The result of the layout setting when we widen the screen display

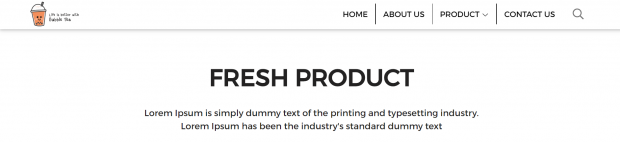
The result when we turn on the logo display on the header menu
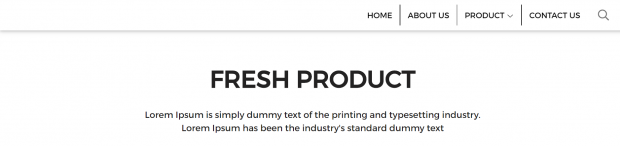
Thre result of header menu when turn off the logo display on fixed navigation menu
(Scroll down to the bottom page)
The result when we turn off the logo display on the header menu
(Scroll down to the bottom page)
Yuka
Business Development at MakeWebEasy