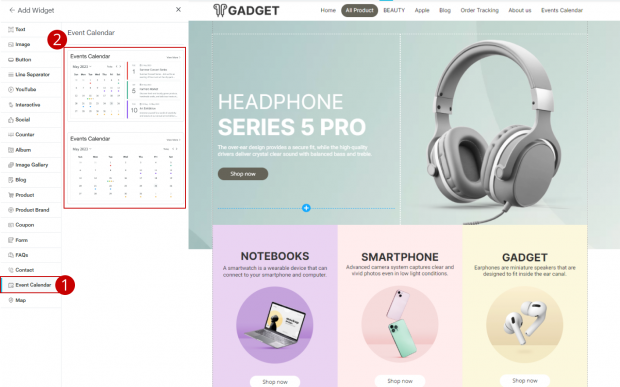
Add Widget
Add and edit widgets: The system is available for customization in the website’s section where in addition to the seven widgets. The system will have a preset to select a total of 19 styles.
- Text
- Image
- Button
- Line Separator
- YouTube
- Interactive
- Social
- Counter
- Album
- Image Gallery
- Article (Blog)
- Product
- Product Brand
- Coupon
- Form
- Frequently Asked Questions (FAQS)
- Contact
- Event Calendar
- Map
1. Text is the creation of text boxes in which users can customize the position of text, the text setting, the text background, and the distance from the edge by adding text. The method for adding text (Text) is as follows.
1. Click on “Text”
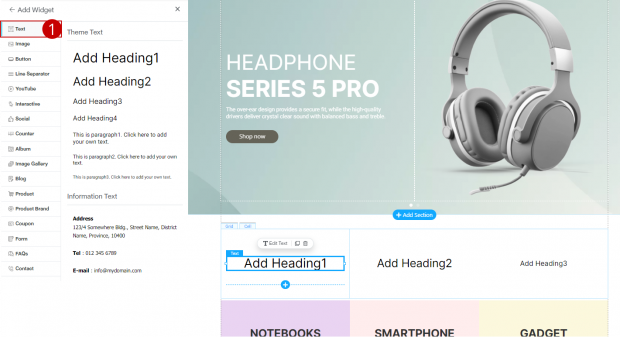
2. The system shows Site Settings on the side, consisting of
2.1 Align text : Users will be able to adjust text only if The width of the text is “fixed width”
2.2 Text settings: Users can set the width of the text in 2 formats: “Full width” and “Fixed width”
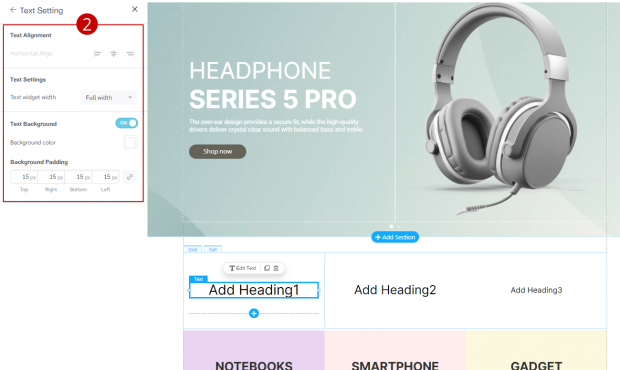
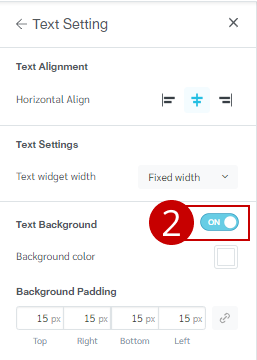
2.3 Text Background :When the Text Background setting is turned on, the system displays the desired background color, along with the distance from the edge.
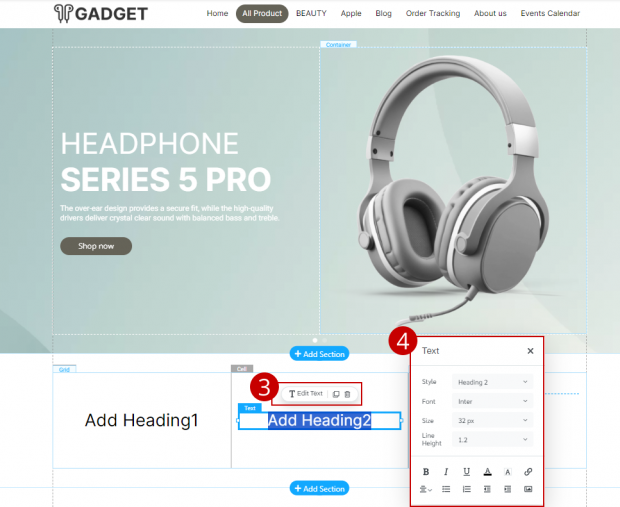
3. In case the user wants to edit the text, click on “Edit Text”
4. Pop up display system for customizing text. Users can customize the font style, font size, spacing, as well as customize the color of the text.
Example of how to customize text background
1. Go to “Text Background”
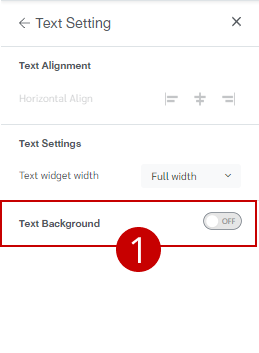
2. Open settings “Text Background”
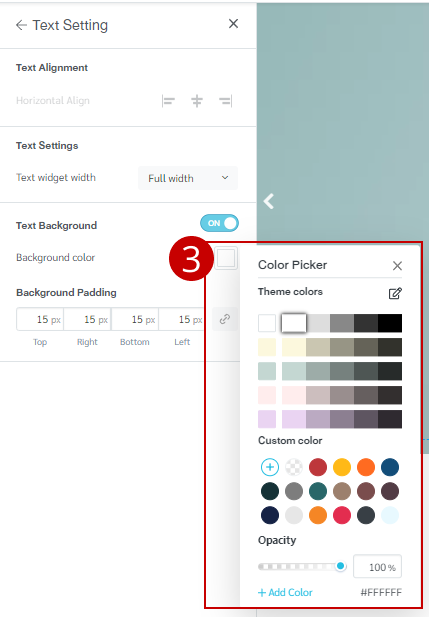
3. Click “Color Box” to select the desired background color
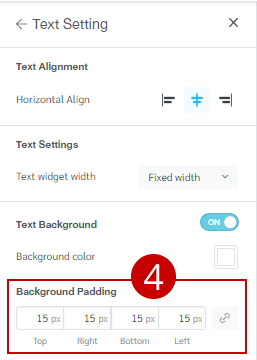
4. Adjust the distance from the edge. The system will set the default value to 15, and the user can adjust the distance from the edge as desired.
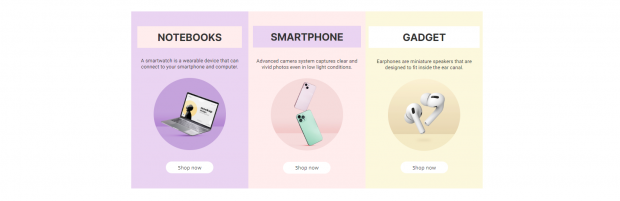
Result in the case of adding a text background
2. Image You can add the images you want in 3 formats. Once added, you can still manage the images according to your needs. by There are methods for adding and customizingImages as follows
1. Click on “Image”
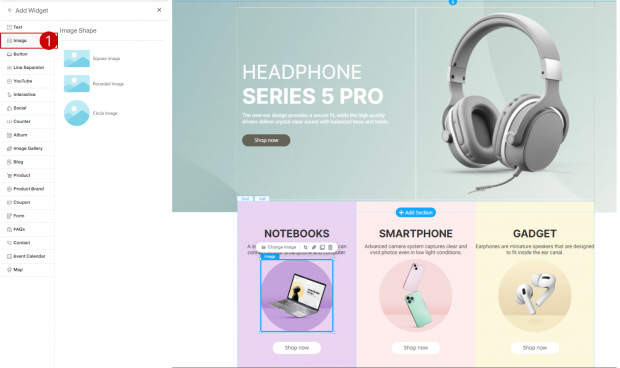
2. The system shows Site Settings on the side, consisting of
2.1 Align images : Users can align images in 3 ways: left-aligned, center-aligned, and right-aligned.
2.2 Image size : Users can adjust the width. and the height of the image.
2.3 Image Settings : User can select image. Choose a picture frame Adjust the transparency of the image. Images can be cropped
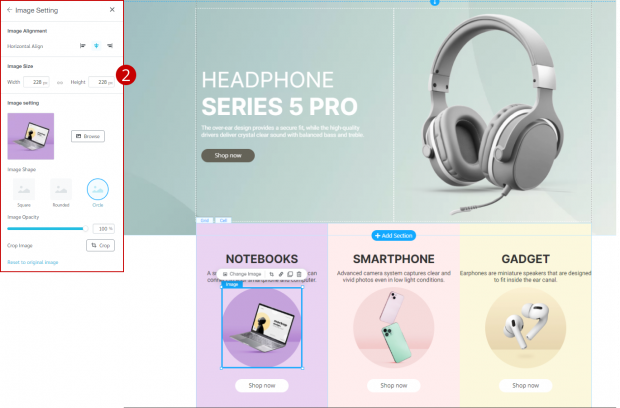
Example of how to adjust images (Image setting)
1. Go to image settings
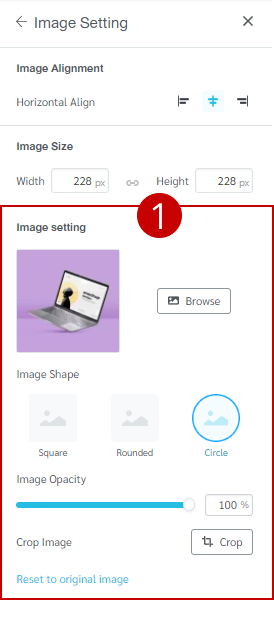
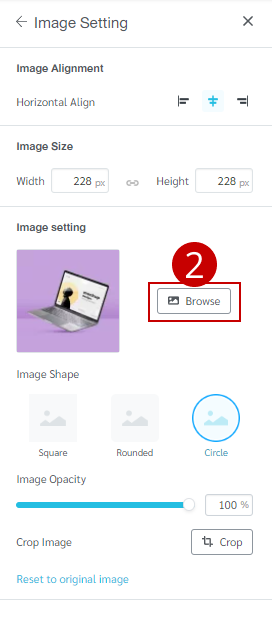
2. Users can change the picture they want. By clicking on the button “Browse” to select the desired image
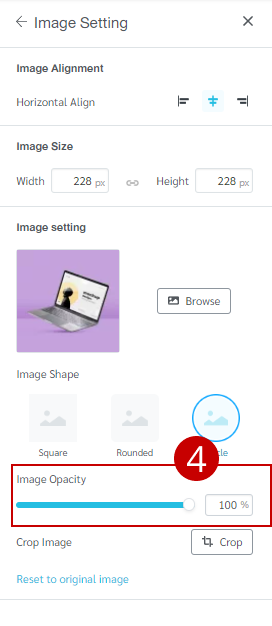
3. You can adjust the picture filling format in 3 formats:
- Square
- Rounded
- Circle

4. Users can adjust the brightness of the image with the default setting set to 100%.
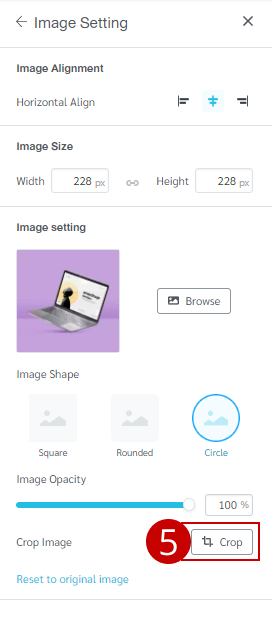
5. In case the user wants to crop the image, click on the “crop” button.
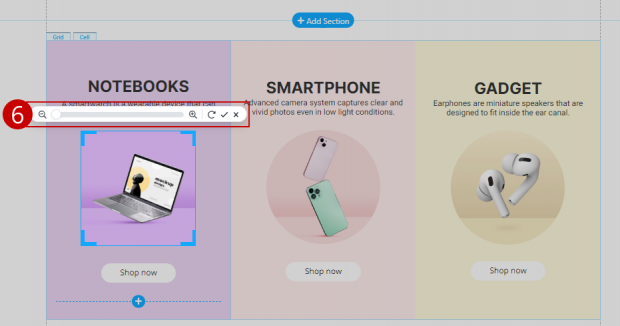
6. The system will display tools for cropping images. Users can crop images as desired.
7. When you have the desired image. Click on the icon “checkmark”
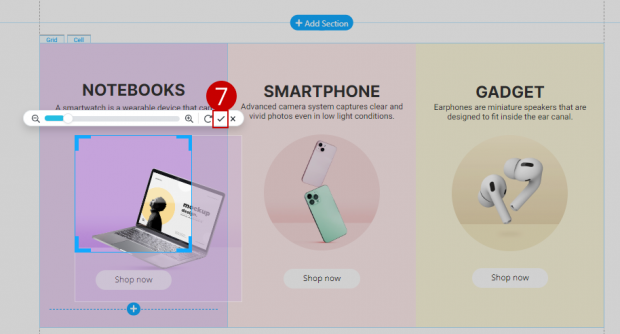
Result in case of cropping the image
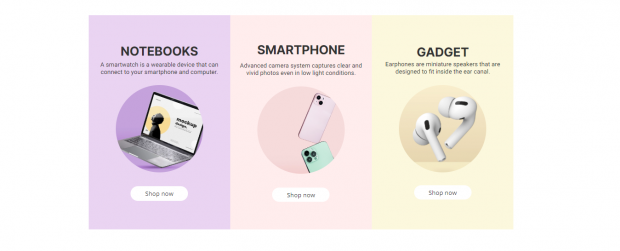
3. Button Widget: You can create buttons as needed. Customize the color, size, and font of the button, and user can also set the path of the button as needed. Here’s how to add a button widget:
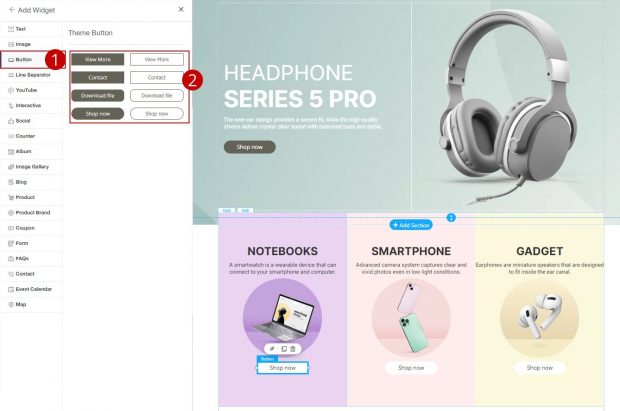
1. Click on “Button”
2. Select the desired button style.
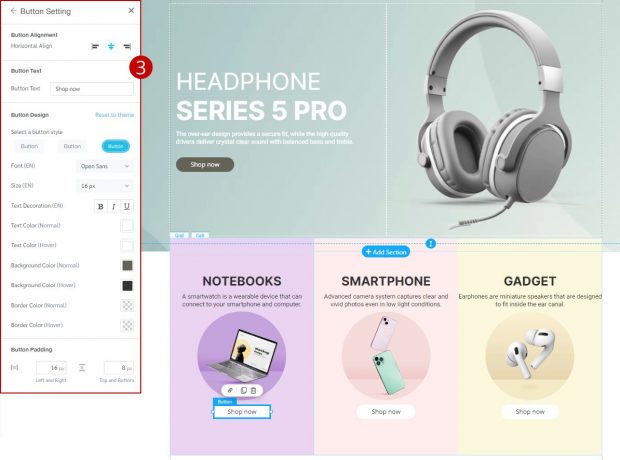
3. The system displays Site Settings. Users can customize the button placement. Button text can customize buttons such as font style, font size, button style, etc. You can also adjust the distance from the edge of the button.
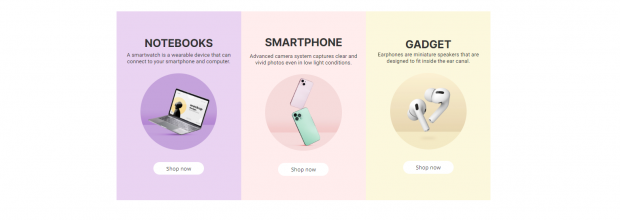
Results in the case of customizing the button design.
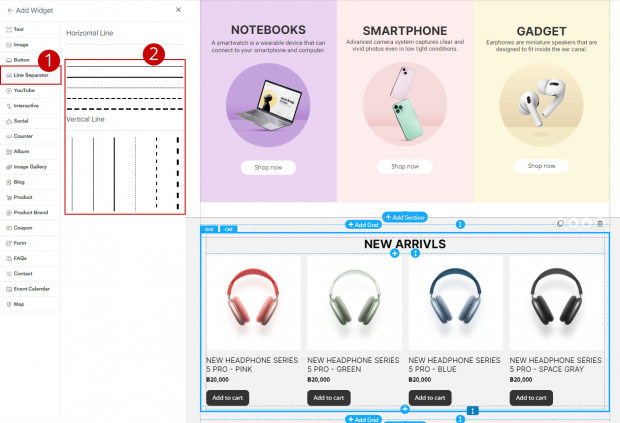
4. Line Separator Can create lines to decorate widget sections. You can also adjust the size, color, and position as desired. The method for adding separator widgets is as follows:.
1. Click on “Line Separator”
2. Select the desired squeeze line style.
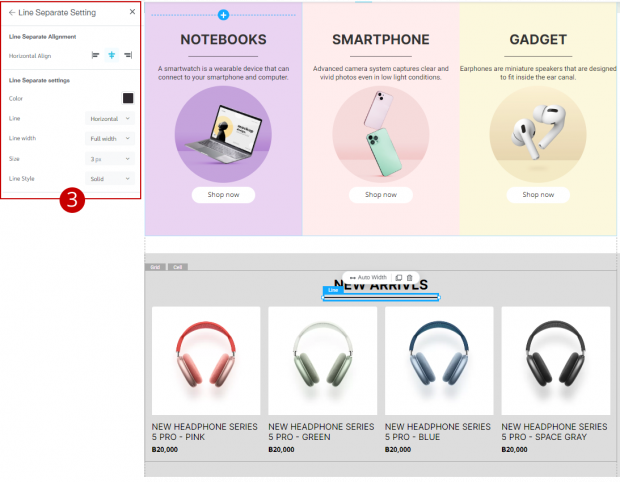
3. The system displays Site Settings. Users can customize the position of the separator lines. Set separator lines, such as separator line color.
Separator line width, size, and separator style can be adjusted.
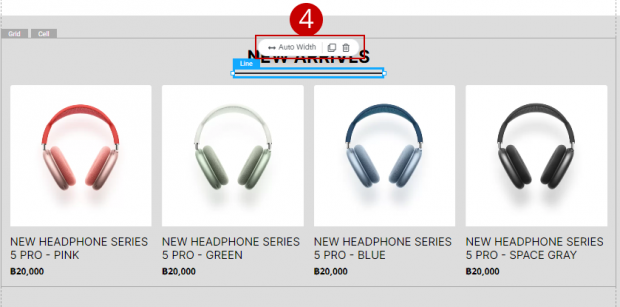
4. In case you want the width of the separator line to fill the entire area, click on the button “Auto Width”
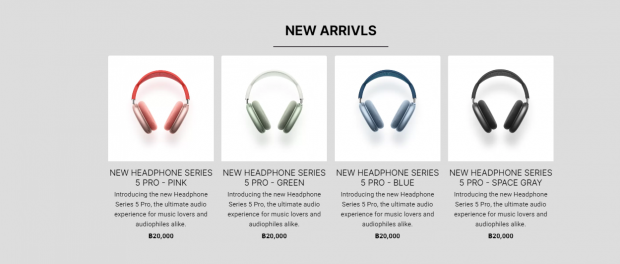
ResultIn case of adding a line separator widget
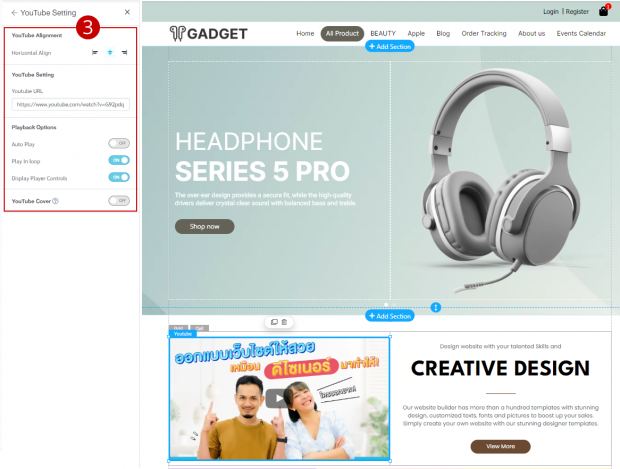
5. YouTube Widget can insert videos from Youtube, set playback options for the clip. The details for adding a YouTube widget are as follows:.
1. Click on the menu “YouTube”
2. Click on YouTube Preset.

3. The system displays Site Settings. Users can adjust the video position. YouTube video settings Display format and set a YouTube video cover
Example of setting method Youtube video cover
1. Turn on toggle “Youtube Cover”
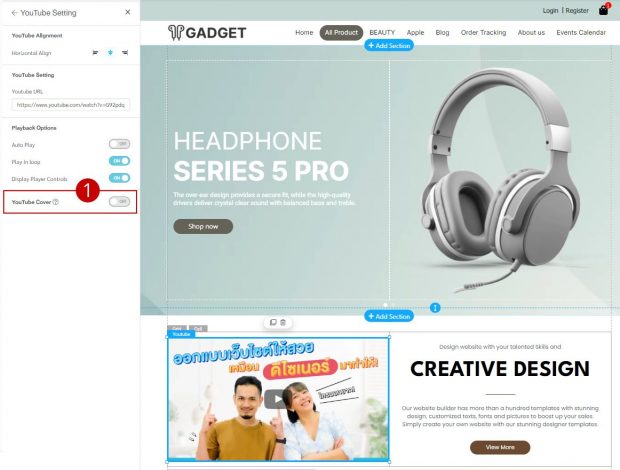
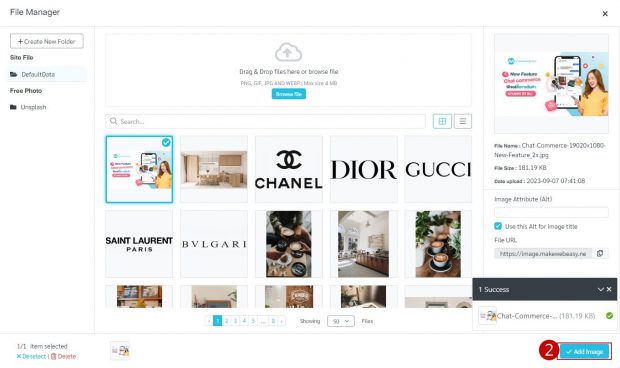
2. Modal Display, a file management system, allows users to select the image of the video cover as desired and then click the “Add image“ button.
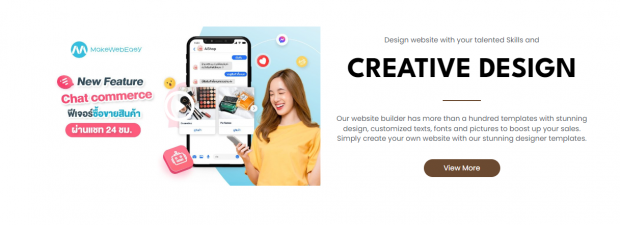
Results in the case of setting YouTube video cover
6. Interactive enables users to create widgets with animated text effects. Here’s how to add interactive widgets:.
1. Click on “Interactive”
2. Select the desired interactive format.
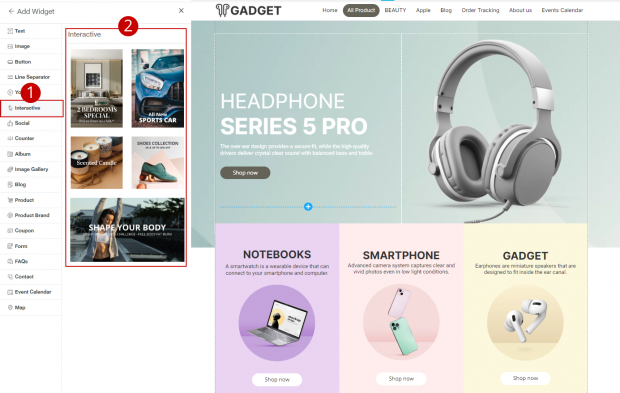
3. The Site Settings display allows users to customize interactive placement, content placement, background customization, and customized effects when pointed at.
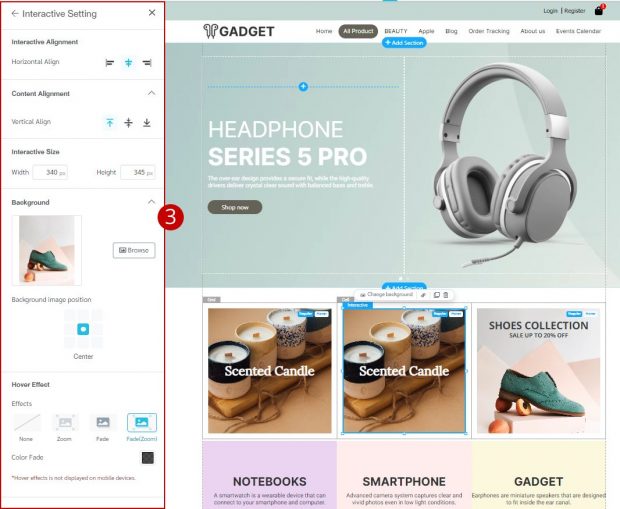
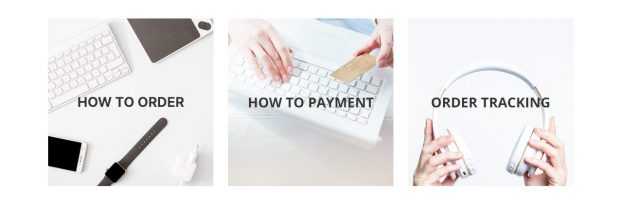
Results in the case of site adjustment with Interactive
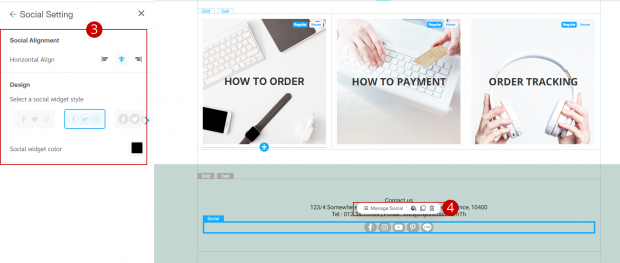
7. Social can create social widgets, allow users to promote the brand, connect with customers, and also enable/disable various social media settings by adding social widgets.
1. Click on “Social”
2. Select the social format (Preset)
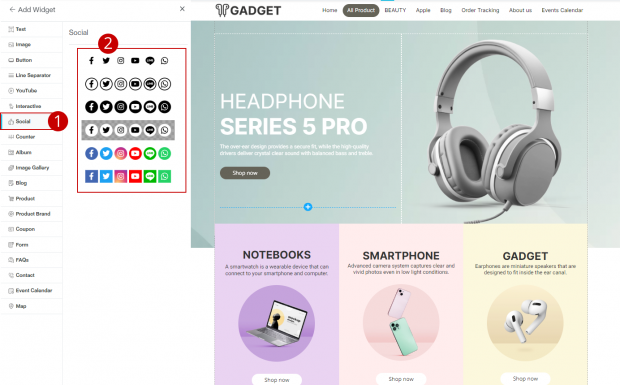
3. Site Settings display system allows users to adjust social media positioning. and customize social media formats according to needs
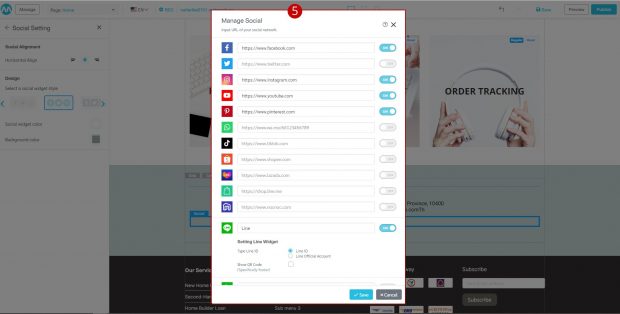
4. In case the user wants to manage social media, Click on the button “Manage Social”
5. Modal display system for managing social media, Users can turn on and off social settings according to their needs.
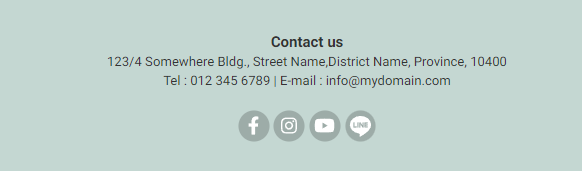
Results in the case of site adjustment Social
8. Counter can set the counter number. and set the speed as desired. The method for adding count widgets is as follows.
1. Click on “Counter”
2. Click on “Add Number Counter”
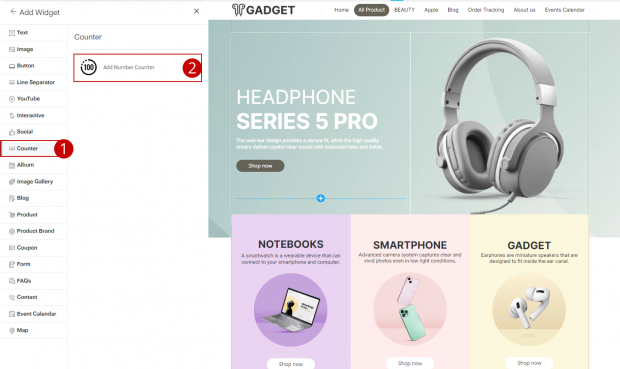
3. The system displays Site Settings to allow the user to set the count.
4. In case you want to edit the count, click on “Edit Counter”
5. Pop up display system for customizing text. Users can customize the font style, font size, spacing, as well as customize the color of the text.

Results in the case of adjusting the count site.
9. Album can create album widgets that have the site’s admin-side information displayed and can also be configured to display category selection and color-coded album titles as desired by adding the following album widgets:
1. Click on “Album”
2. Select a format (Preset) according to your needs.
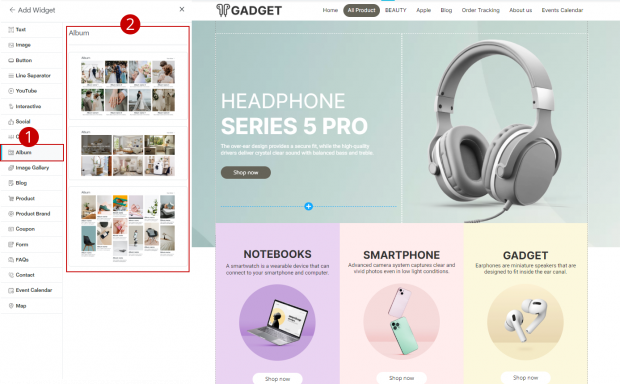
3. Site settings display system on the side, consisting of a total of 5 management systems:
3.1 Manage Photo Album
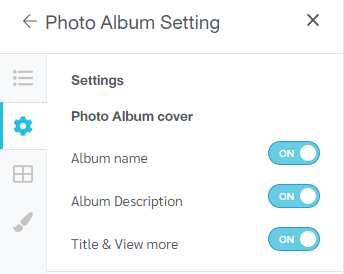
3.2 Settings Photo Album cover
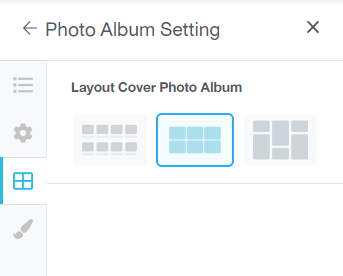
3.3 Album Layout
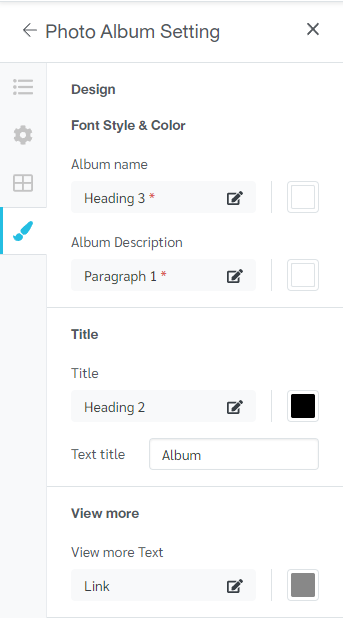
3.4 Design
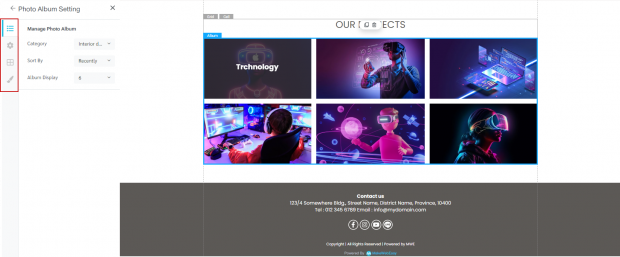
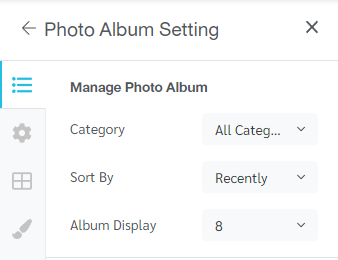
3.1 Manage Photo Album
Click on the “Manage” column to select categories, organize data, and display the number of photo albums.
3.2 Settings Photo Album cover
Click on the tab “Settings” to enable/disable the settings album cover display
3.3 Album Layout
Click on the tab “Layout” to select the album cover style
3.4 Management Design
Click on the tab “Design” to customize font style and font color
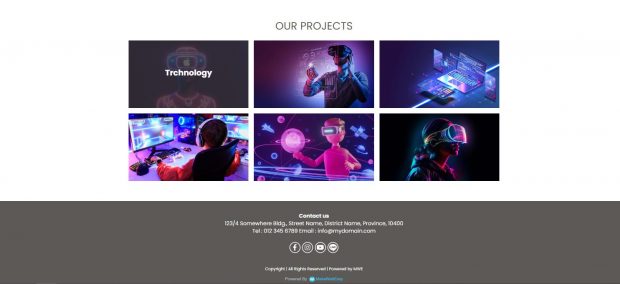
Example of display settings for Image Gallery
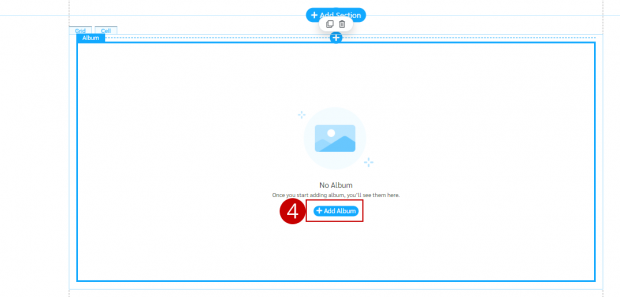
4. In the case of adding an album widget without any information in the background system, click Add Album.
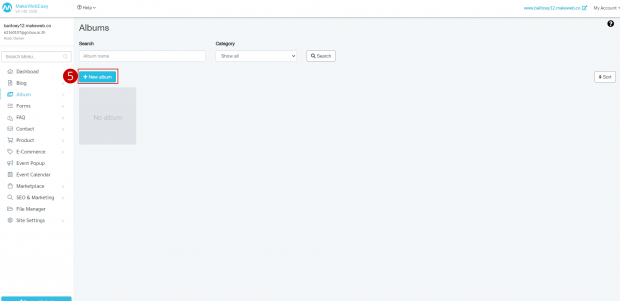
5. The system will take you to the back-end system. By going to the menu “Album”> “All Album” then click on the button “Add album”. Details on adding albums can be found at Creating a new album
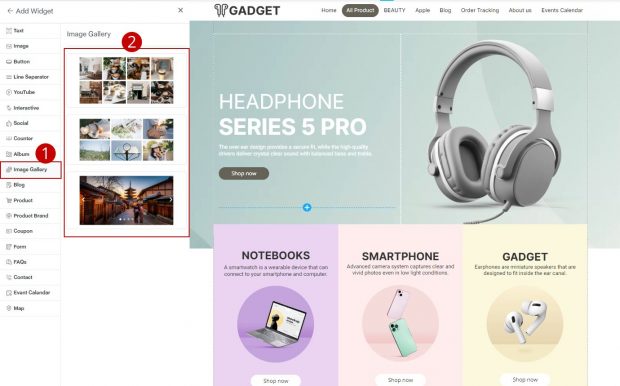
10. Image Gallery allows you to create custom image gallery widgets and also customize the display of images by adding image gallery widgets.
1. Click on “Image Gallery”
2. Select a format (Preset) according to your needs.
3. The system showing Site settings on the side consists of 2 management systems:
3.1 Manage Image Gallery
3.2 Managing photo gallery Layout
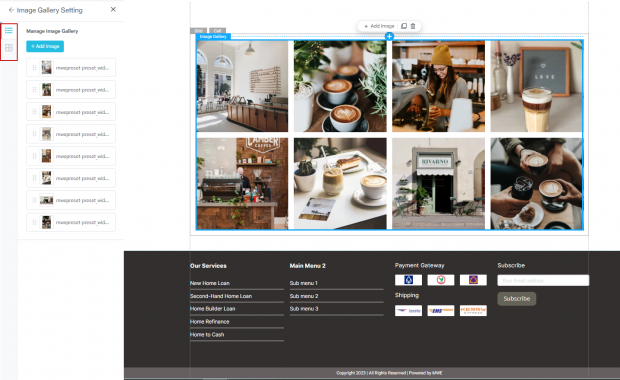
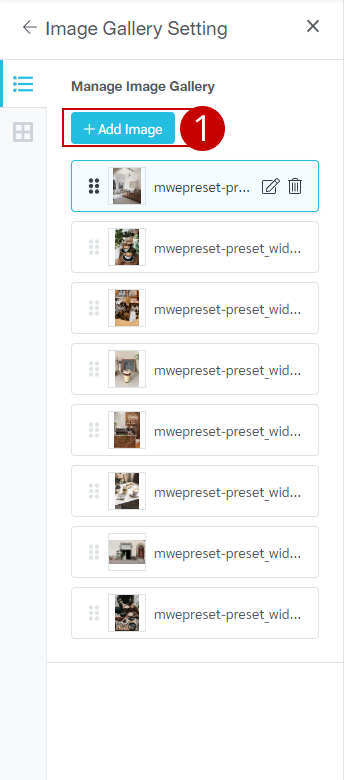
3.1 Manage Image Gallery
Click on the tab “Manage” to manage photo albums, such as adding, deleting, and editing photos. The gallery management method is as follows:.
1. Click on the button “Add Image”
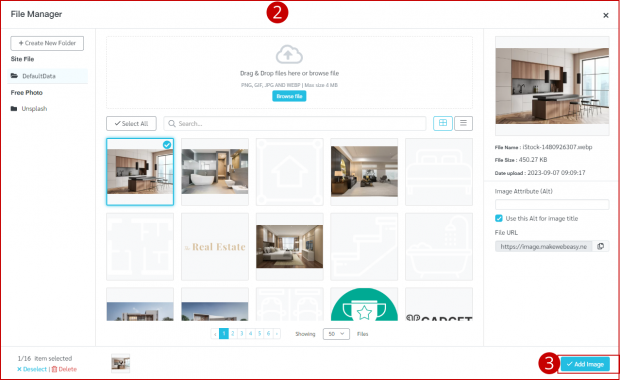
2. Modal display system “File Manage”
3. Click on the button “Add Image”
4. Click on “Edit icon” to edit the image
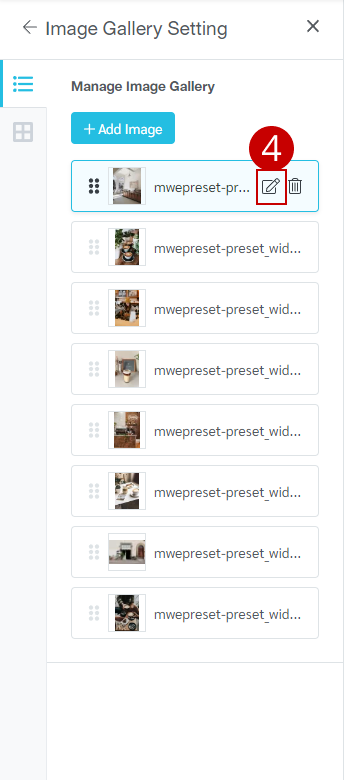
5. Click on “Trash icon” To delete image

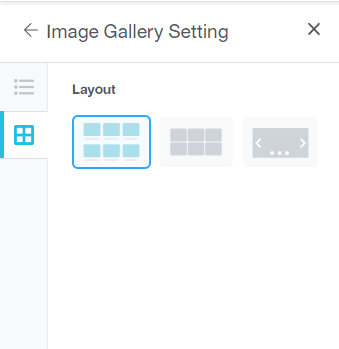
3.2 Managing photo gallery Layout
Click on the tab “Layout” to select the image gallery format
Example of display settings for Image Gallery
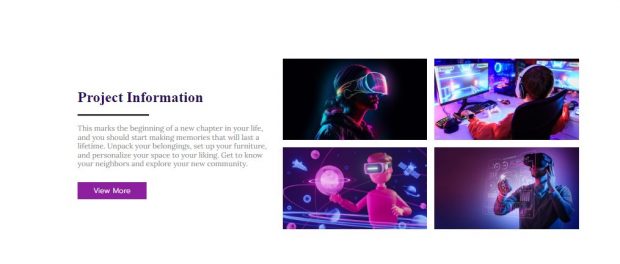
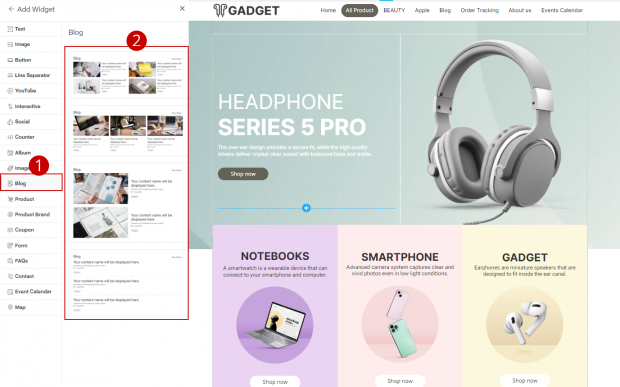
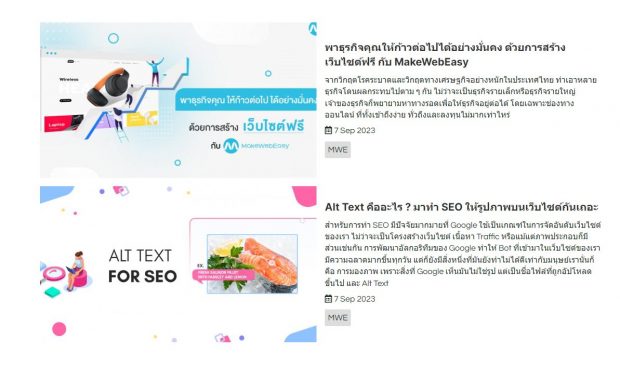
11. Blogs can create article widgets with article writing in the sidebar, drag them to display on the page, and select various display settings by adding a Blog widget.
1. Click on “Blog”
2. Select a format (Preset) according to your needs.
3. Site settings display system on the side consists of 4 management systems including:
3.1 Manage Blog
3.2 Blog cover display
3.3 Management Layout
3.4 Management Design
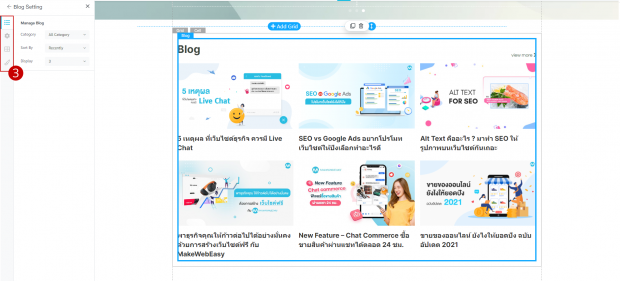
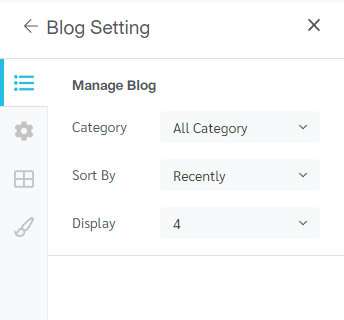
3.1 Manage Blog
Click on the tab “Manage” to choose category, and sort data and show the number of articles
3.2 Blog cover display
1. Click on the tab “Settings” to enable / disable the set up Article cover display

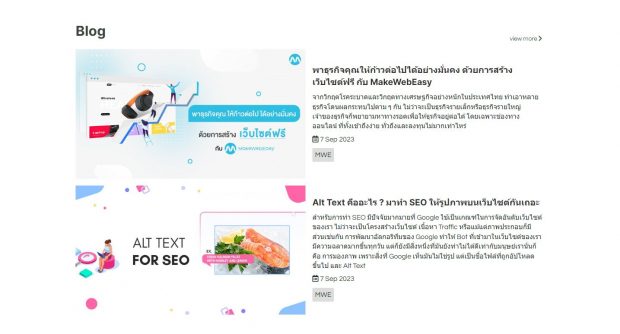
Result in case of opening all article display settings.
2. In the case of setting the display of the article cover page by opening the article title only, The system will display results as follows.
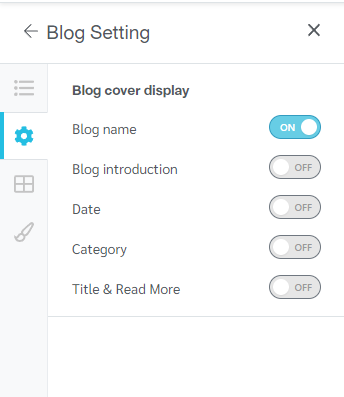

Result in case of opening article title setting
3. In the case of setting the display of the cover page of an article by opening the article title and Initial content (Blog introduction), the system will display as follows:
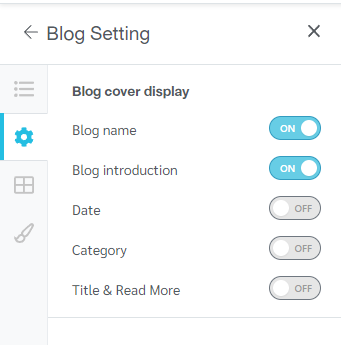

Results in the case of opening the article title setting. and the Blog introduction
4. If the default is to show the page, the article, the title of the article and the introduction, the date, the category of the article, the system will display the following results:
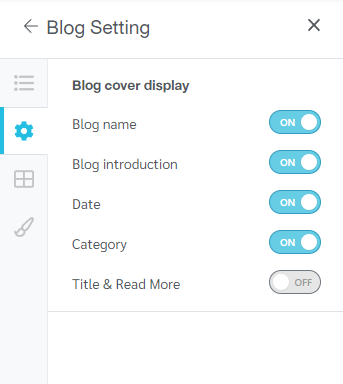
Results in case of opening settings Blog introduction, date and article category
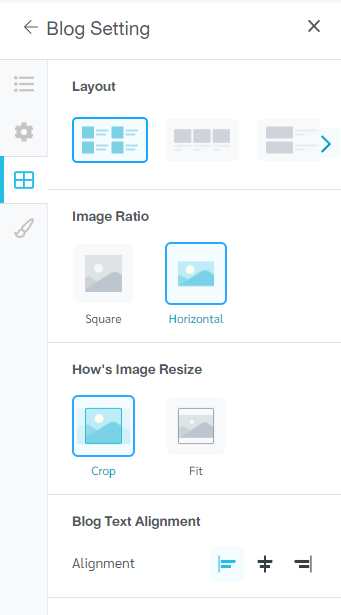
3.3 Management Layout
Click on the tab “Layout” to select the article format. Adjust aspect ratio resize picture and positioning of the text of the article.
3.4 Management Design
Click on the tab “Design” to customize font style and font color

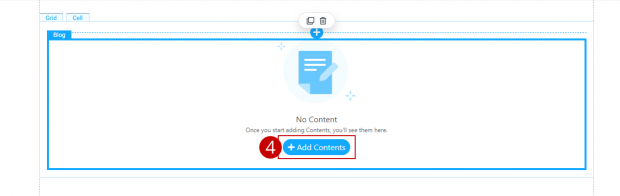
4. In the case where the user adds an article widget (Blog) without having article information in the back-end system. Click on the button “Add Contents” to add article information
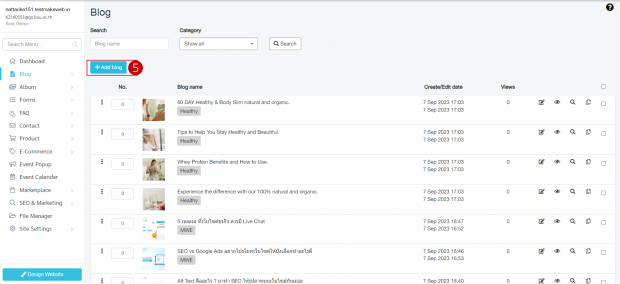
5. The system will take you to the backend system, go to the menu “Blog” Then click on the button “Add Blog”. The method of adding content (Blog) can be viewed at Adding a post (Blog)
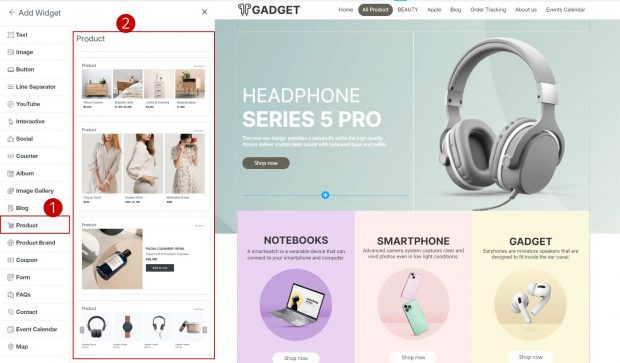
12. Product can be created by pulling up the display of products that the website owner has already created and showing them to customers who can order products. You can also customize the colors and layout. The method for adding product widgets is as follows:.
1. Click on “Product”
2. Choose a format (Preset) according to your needs.
3. The system shows Site settings on the side, consisting of a total of 4 management systems:
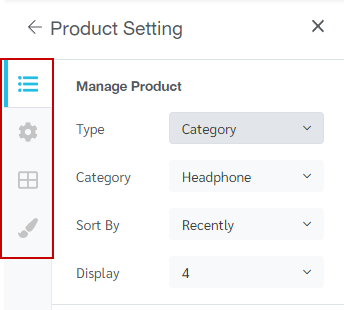
3.1 Manage Product
Click on the tab “Manage” to select a Type Category, Sorting Order of product information, and the number of products you want to display. This part of management information will vary depending on the user.

3.2 Product Settings
1. Click on the “Settings” tab to enable/disable the product cover display settings. By opening the display of all product covers
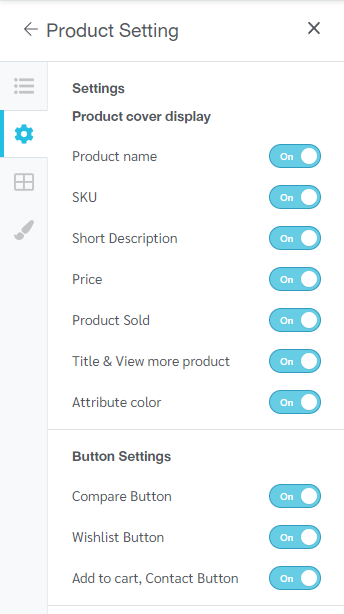
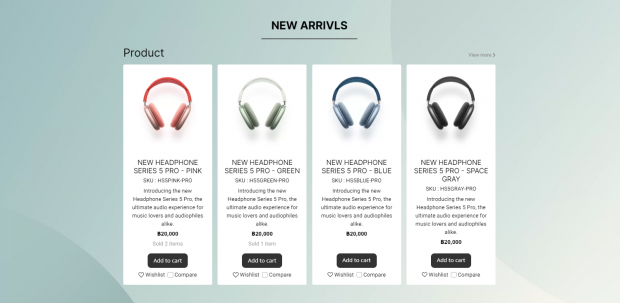
Result in case of opening all product settings
2. Users can turn on/off display settings, Display product-specific cover, product name, short description and product price
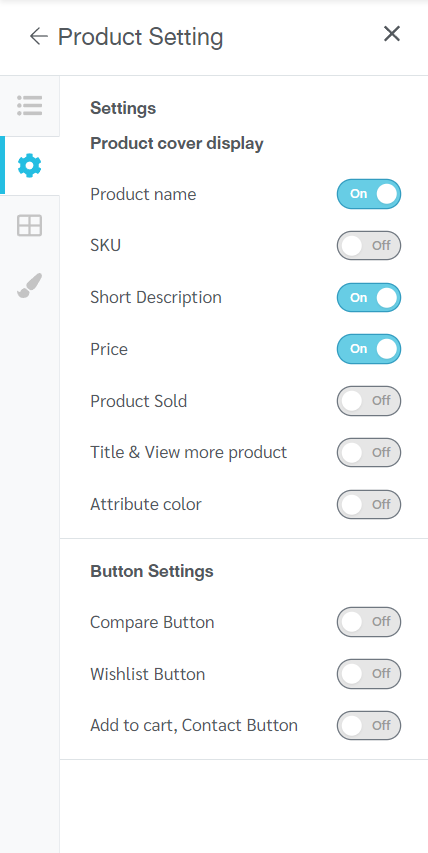
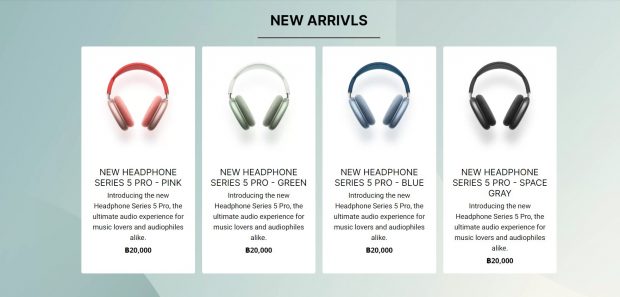
Display results in the case of opening the product name setting. Short description and product prices
3. Case on/off display settings Display the product cover by opening the product comparison button and wishlist
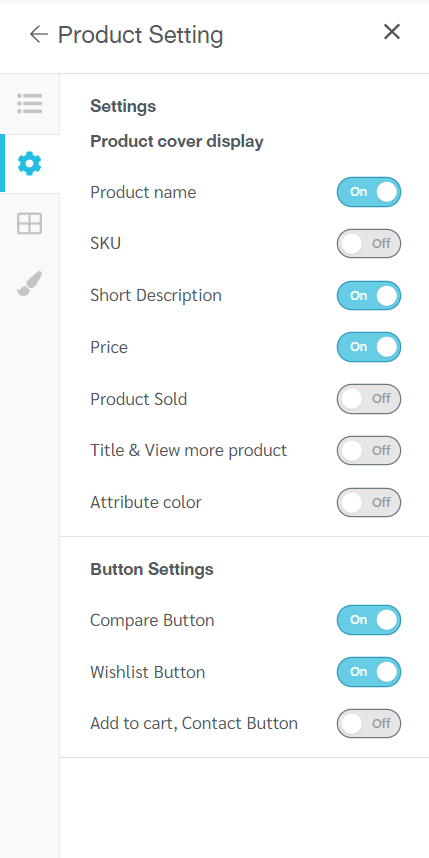

Display results if the product comparison button and wishlist display settings are turned on.
3.3 Product Layout
Click on the tab “Layout” to select the product cover format. Set the aspect ratio Resize picture and align text
3.4 Site Design
Click on the tab “Design” to change the font style, font size, font color, and button style. Button colors and product labels can be customized.
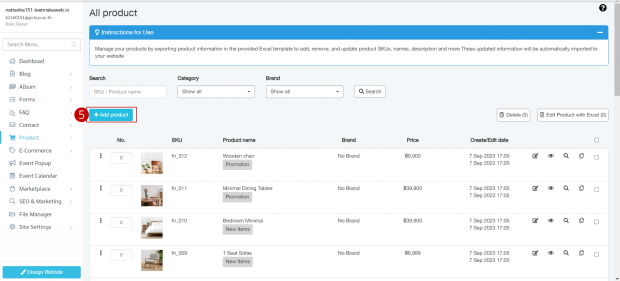
4. In the case where the user adds a product widget without having product information in the back-end system. Click on the button “Add Product” to add product information
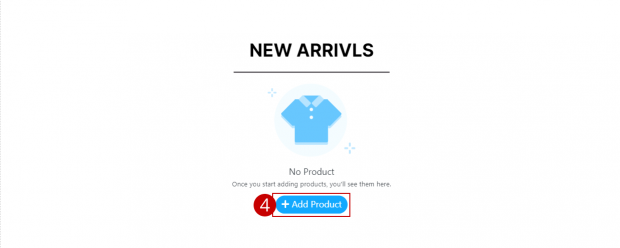
5. The system will take you to the back-end system to go to the Product menu, then to the “All Product” menu, click on the “Add Product” button, where you can see the details on how to add products at Simple product and Group product.
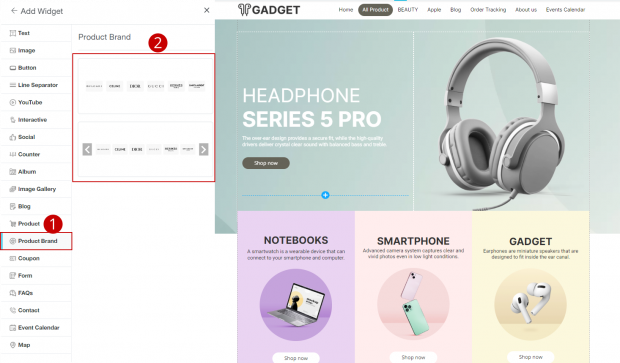
13. Product brand creates a product brand widget where the store organizes product groups to pull the display. You can also customize the colors and layout. The method for adding product brand widgets is as follows.
1. Click on “Product brand”
2. Choose a format (Preset) according to your needs.
3. Site settings display system on the side consists of 2 management systems:
3.1 Manage Product
3.2 Layout
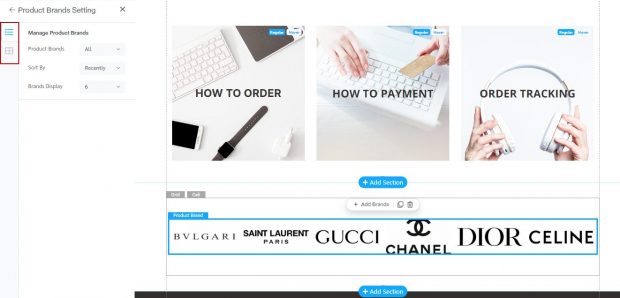
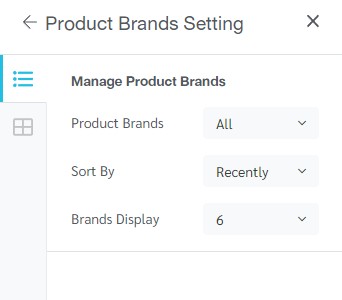
3.1 Manage Product
Click on the tab “Manage” to select category, sorting data and displaying the number of product brands
3.2 Product Brand Layout Management (Layout)
Click on the tab “Layout” to select the display format of the desired product brand
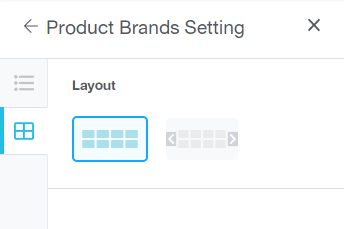

Example of website design customization and product brand display settings
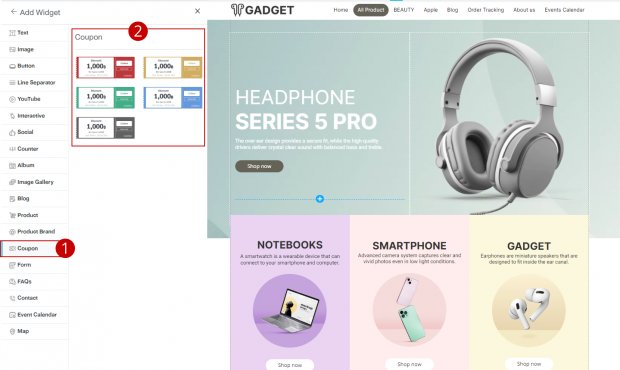
14. Coupon can create a discount coupon widget to display. So that customers can collect the coupon code for use. The details for adding a coupon widget are as follows.
1. Click on “Coupon”
2. Choose a format (Preset) according to your needs.
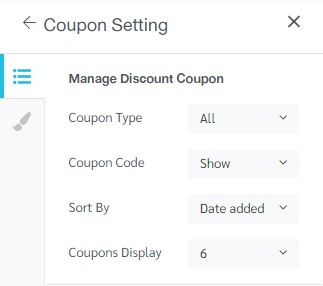
3. The system shows Site settings on the side, consisting of 2 management systems:
3.1 Coupon Product
3.2 Design
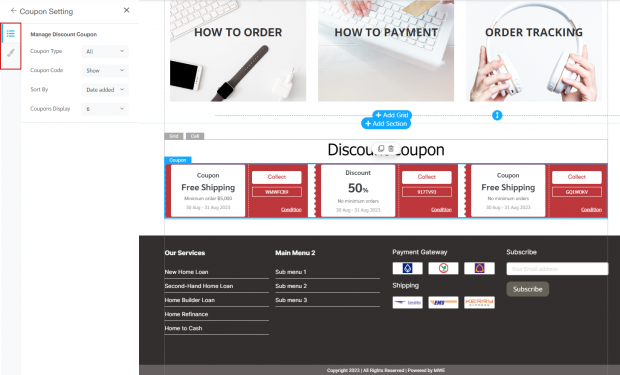
3.1 Manage Coupon Product
Click on the tab “Manage” to select Coupon type, code, data sorting and display the amount of coupons
3.2 Design
Click on the tab “Design” to customize the coupon

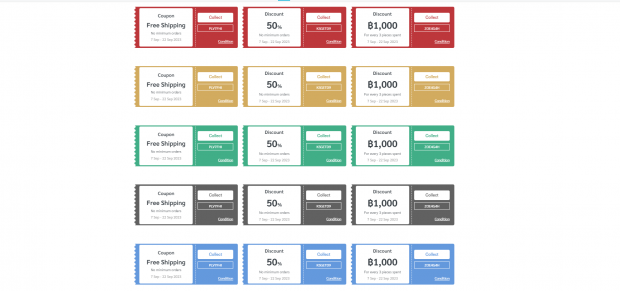
Example display when adding a coupon widget
4. Case where a coupon widget is added. without any information in the back-end system click on “Add Coupon”
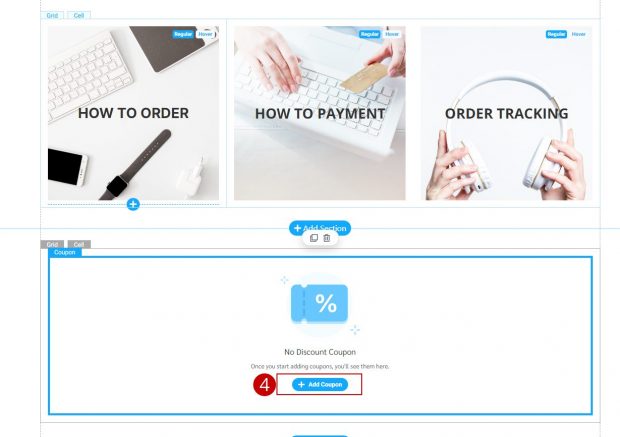
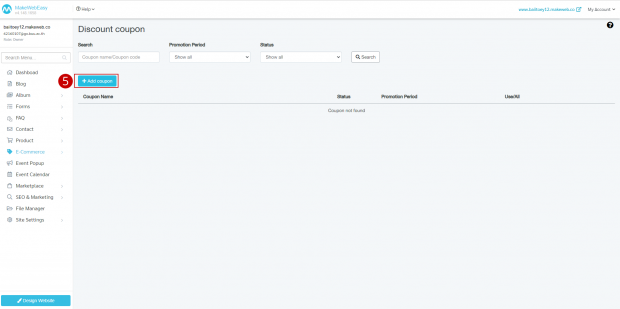
5. The system will take you to the back-end system. By going to the menu E – Commerce select the menu Discount cupon then press Button “Add Coupon”. How to create a discount coupon, see details at Discount coupon system
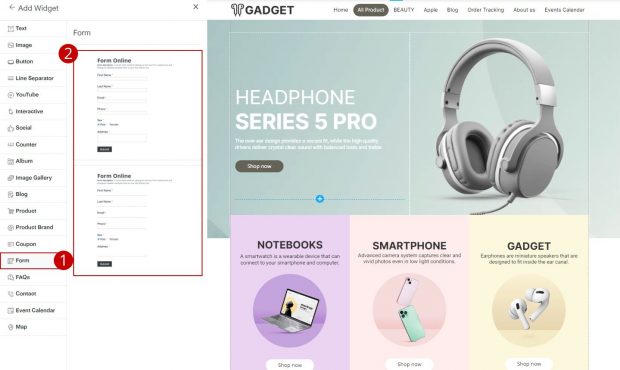
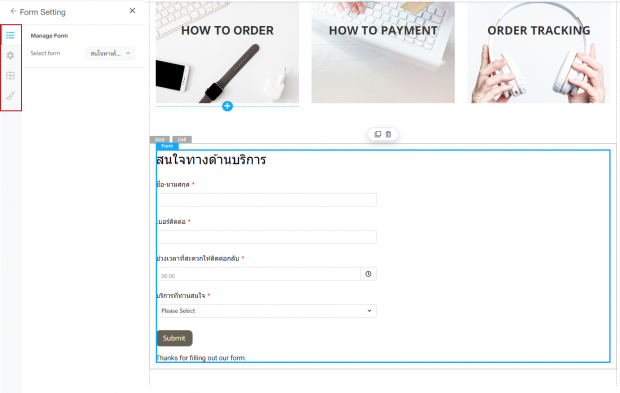
15. Form: A form widget can be created to pull the display of the form that the web owner has already created and display it for customers to submit information. You can also customize the colors and layout.
1. Click on “Form”
2. Select the desired form style (Preset).
3. The system shows Site settings on the side, consisting of a total of 4 management systems:
3.1 Form management
3.2 Form settings
3.3 Form layout
3.4 Site design
3.1 Form management
Click on the tab “Manage” to select Required form

3.2 Managing form settings
Click on the tab “Settings” to enable / disable the form name and form details

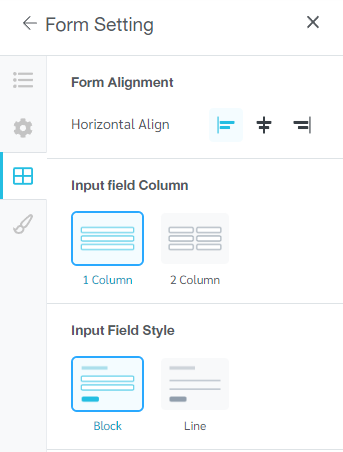
3.3 Forms Layout
Click on the tab “Layout” to format the display of the form
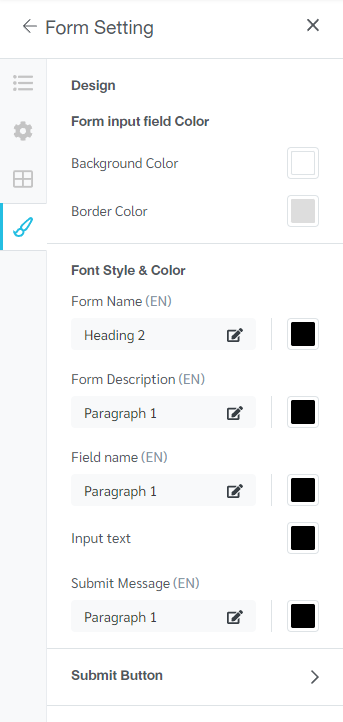
3.4 Site Design
Click on the tab “Design” to customize font style and color
4. Caseadded form widget without any information in the back-end system Click on “Add Form”
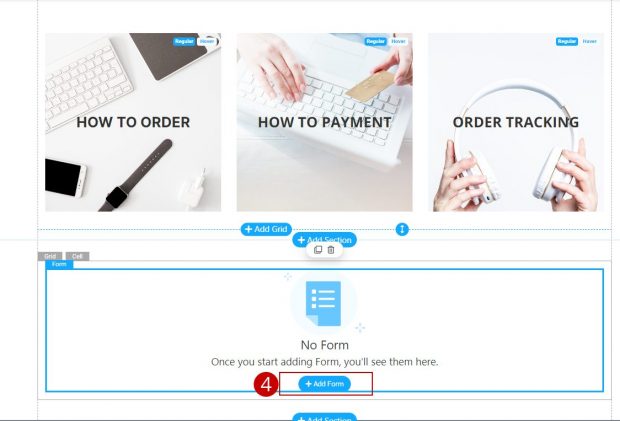
5. The system will take you to the back-end system. Then go to the menu “Forms” Click on the button “Add Form”. How to add a form, details can be found at Online form system management
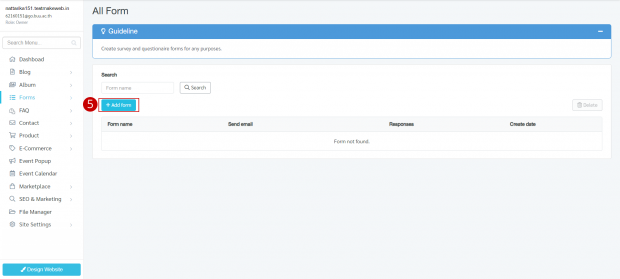
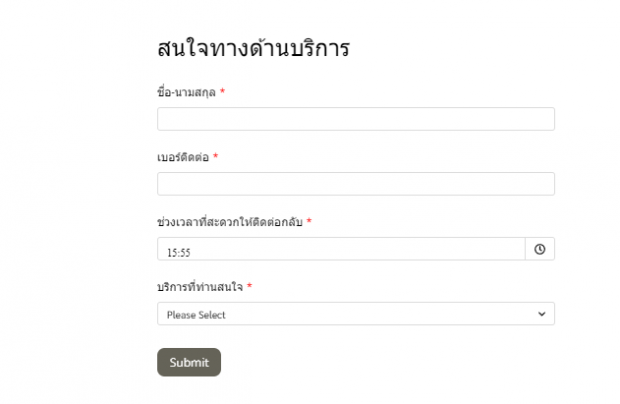
Example of displaying “Forms” settings
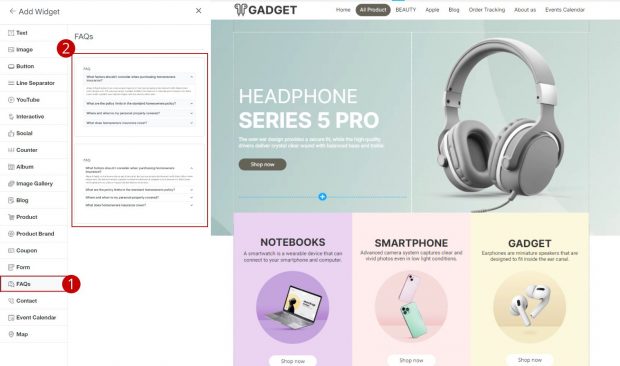
16. Frequently Asked Questions (FAQs) Can create questions and answers that frequently arise during the sale of products or services. To help reduce the process of answering repeated questions between website owners and customers. You can also customize the display format.
1. Click on “Frequently Asked Questions” (FAQs)
2. Select the desired FAQ format.
3. The system shows Site settings on the side, consisting of a total of 4 management systems:
3.1 FAQs
3.2 Settings
3.3 Layout
3.4 Design
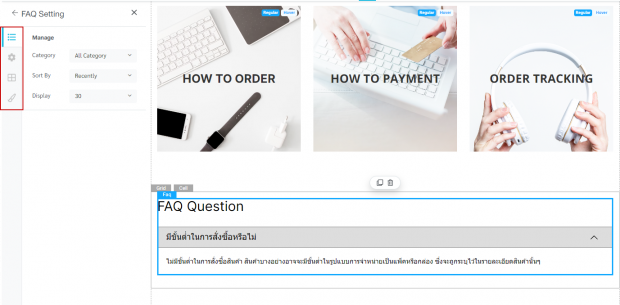
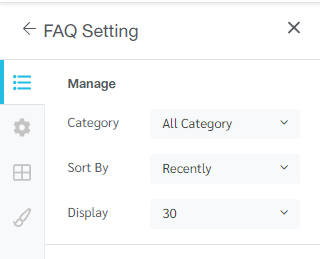
3.1 FAQs
Click on the “Manage” column to select categories, organize data, and display the number of photo albums.
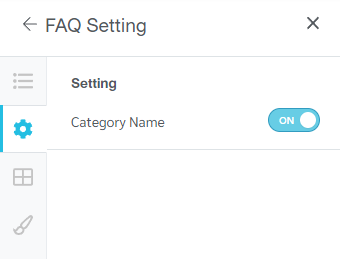
3.2 Settings
Click on the tab “Settings” to enable/disable category name display settings
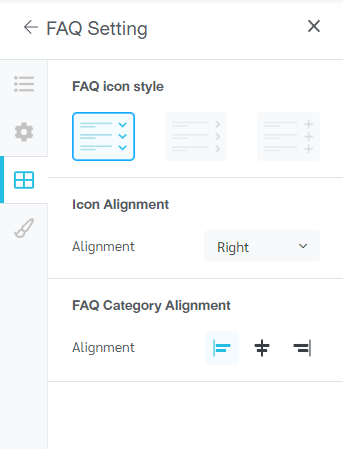
3.3 Layout
Click on the “Layout” tab to select an icon. You can align the icons and text of FAQ categories.
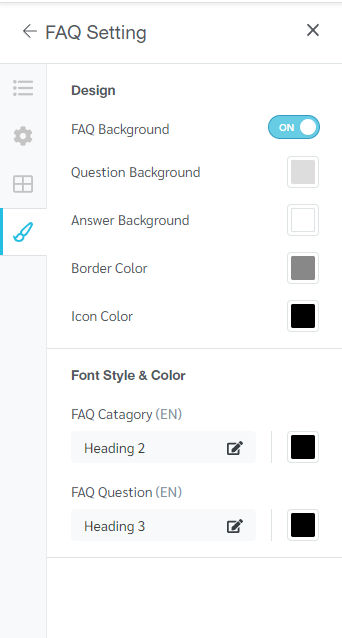
3.4 Design
Click on the tab “Design” to customize font style and color
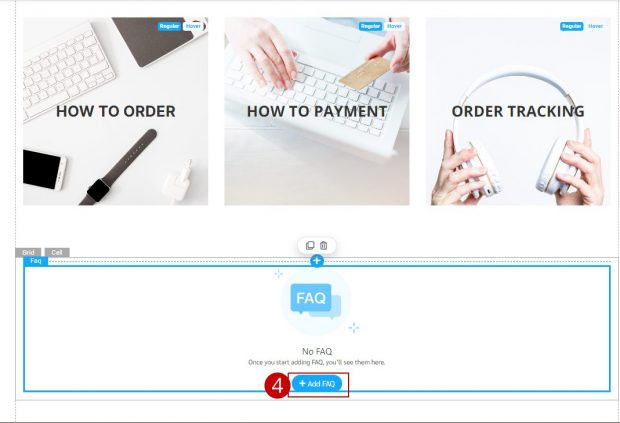
4. For adding a FAQ widget without any information in the backend, click “Add FAQ“.
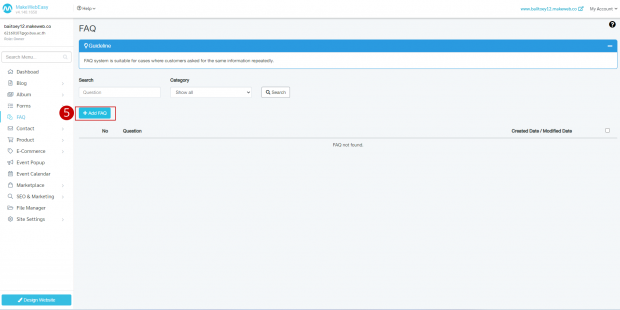
5. The system will take you to the back-end system. Go to the menu FAQ and then click on the button “Add FAQ” . By adding frequently asked questions, details can be found at Frequently Asked Questions (FAQ)
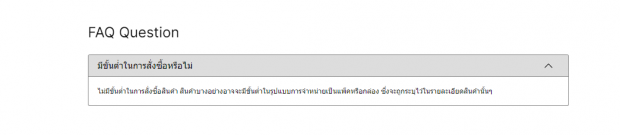
Example display of frequently asked questions (FAQs)
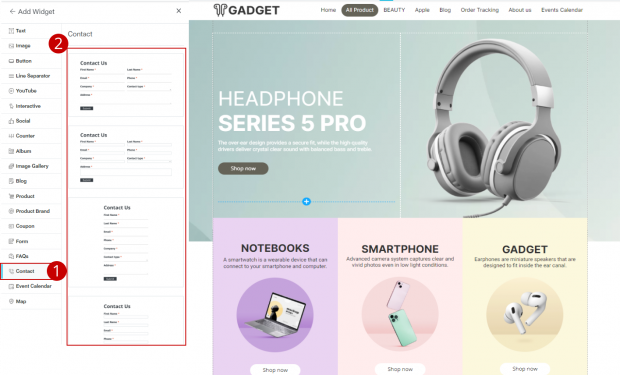
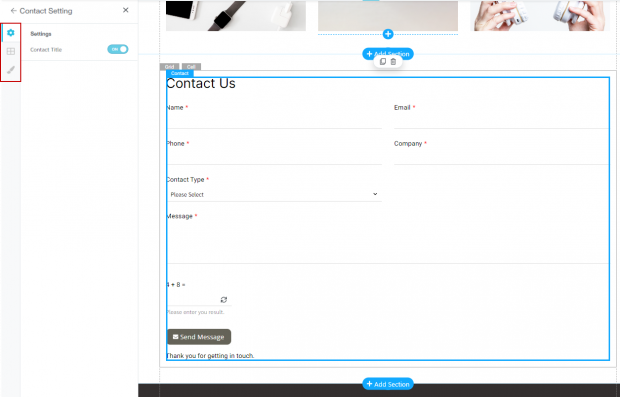
17. Contact message enables to create a contact channel widget for customers to send messages through the message box system. Detailed information will be stored in the web management message box.
1. Click on “Contact”
2. Select the desired contact message format.
3. Site settings display system on the side consists of 3 management systems:
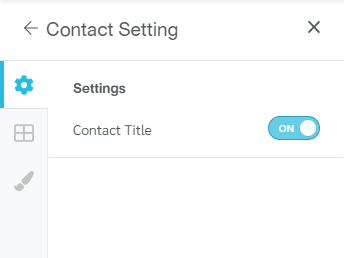
3.1 Settings
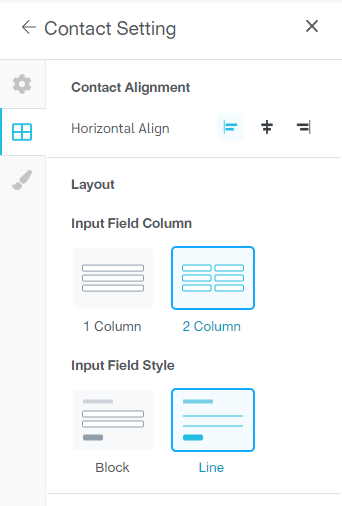
3.2 Layout
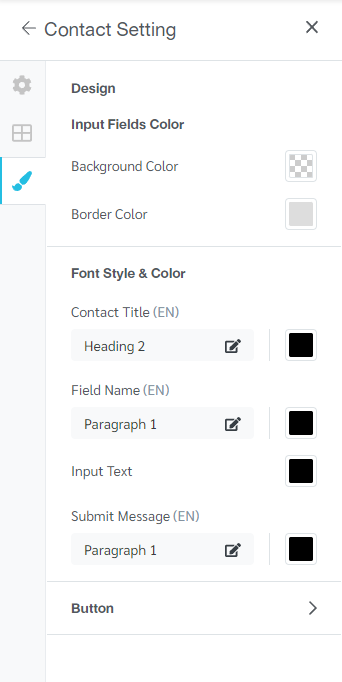
3.3 Design
3.1 Settings
Click on the tab “Settings” to enable/disable contact message topic display settings
3.2 Managing contact message formats (Layout)
Click on the tab “Layout” to align the text of the article and select the format of the article
3.3 Design
Click on the tab “Design” to customize font style and color

Example display of contact us settings
18.Event Calendar You can create an Event Calendar widget to view upcoming events. through the activity calendar You can also customize the format and display settings of the event calendar.
1. Click on “Event Calendar”
2. Select the desired event calendar format.
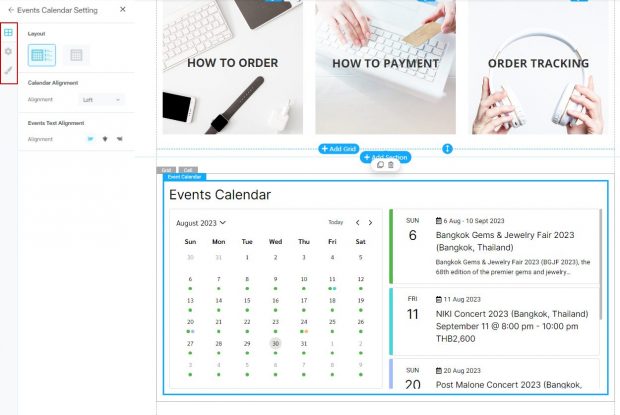
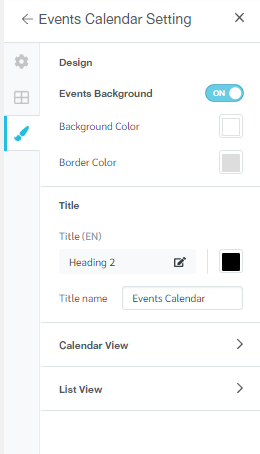
3. Site settings display system on the side consists of 3 management systems:
3.1 Settings
3.2 Layout
3.3 Design
3.1 Managing activity calendar settings
1. Click on the tab “Settings” to enable/disable event calendar display settings
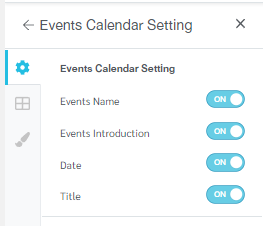
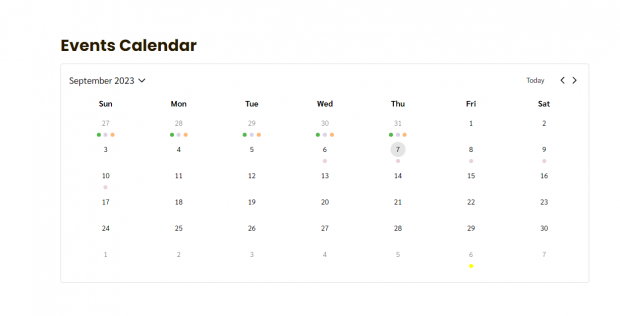
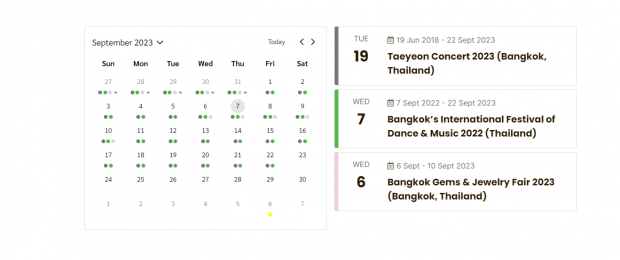
Result afterin opening event calendar settings for all calendar formats
2. In the case of turning off the content initial word setting (Events Introduction)
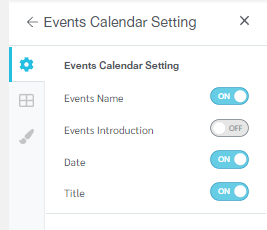

Result after disabling event calendar content prefix setting in list format
3. In the case of turning off the default word settings, content (Events Introduction) and Title
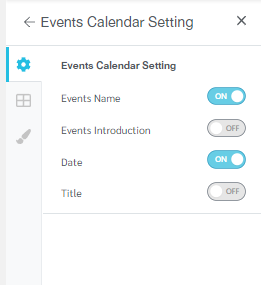
Result after disabling event calendar content prefix setting in list format
3.2 Managing event calendar formats
Click on the tab “Layout” to select the desired event calendar format. Including aligning the position of the text.
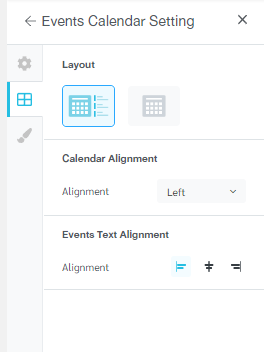
3.3 Site design customization management
Click on the tab “Design” for customizing the event calendar website in both calendar formats. and program format by adjusting the design depending on the layout chosen.
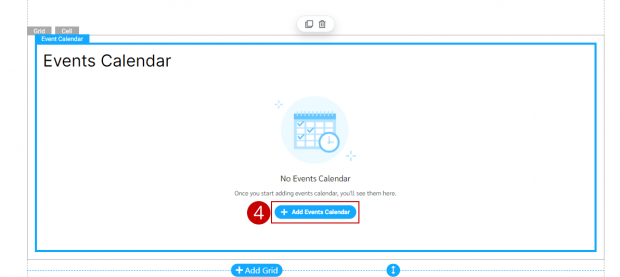
4. Case Added event calendar widget. There is no activity calendar information in the back-end system. Click on “Add Events Calendar”
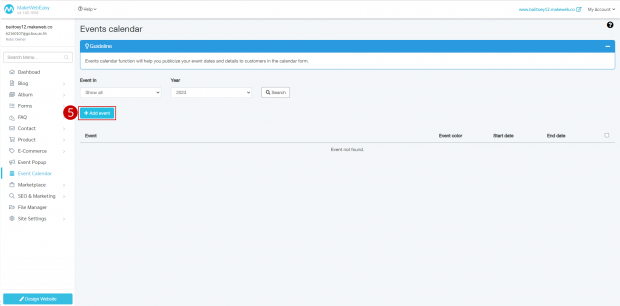
5. The system will take you to the back-end system by going to the Event Calendar menu when you click on the Add Event button. The system will take you to the add information page, where the details of adding information can be viewed at the Events Calendar
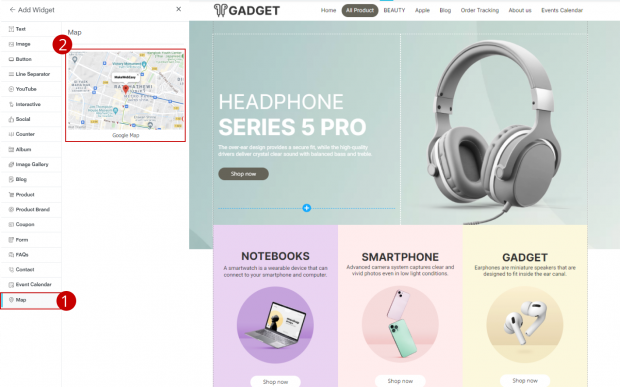
19. Map widget can be created to display 1 store pin location. If it is a multiple pin location format, you must proceed with the Google Map settings. The API for adding map widgets is as follows.
1. Click on “Map”
2. Choose a map style.
3. Site settings display system on the side consists of 2 management systems:
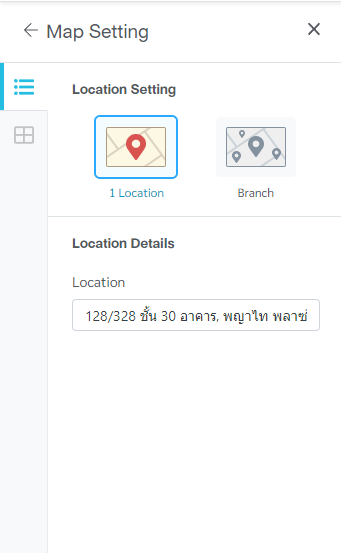
3.1 Manage Map
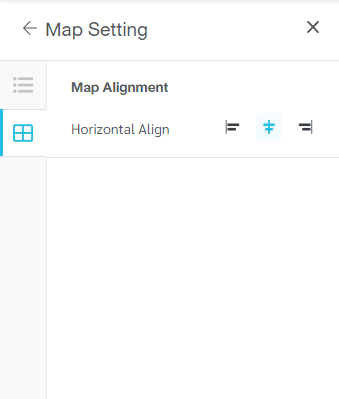
3.2 Layout
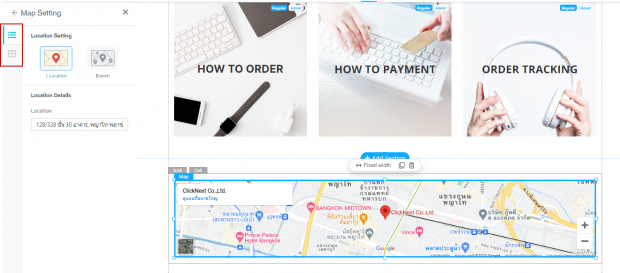
3.1 Manage Map
Click on the tab “Manage” to choose displaying the address location and being able to fill in address details
3.2 Layout
Click on the tab “Layout” to align the map text
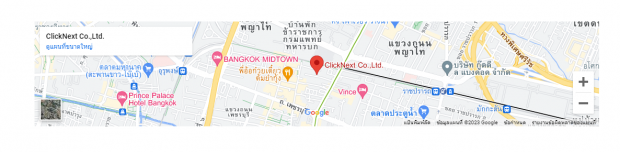
Example of displaying map settings